Showing posts with label Lawn Fawn. Show all posts

Saturday, April 27, 2019

Love You To The Starbucks and Back


Hi and welcome. Today I'm sharing this fun card that's perfect for the coffee-loving persons in your life. When I started this card, I was simply going to use the sentiment I love you to the stars and back, but as I was finishing the card, I thought it would be fun to add the bucks and make this silly. 

I have a video that will walk you through the process of creating the card, it's super simple.


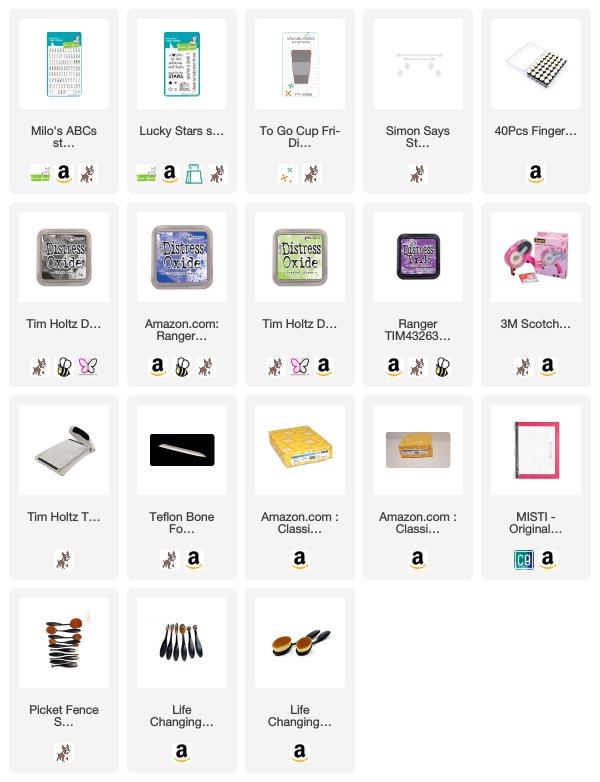
A few things I want to share, the embossing folder is by Sizzix from stash, and the enamel dots are My Mind's Eye Winterberry Enamel Dots. 

DISCLOSURE: I may be an affiliate for products that I recommend. If you purchase those items through my links, I will earn a commission. You will not pay more when buying a product through my link. I only recommend products that I use and love myself, so I know you’ll be in good hands.

Wednesday, November 8, 2017

Have A Magical Holiday Season


Hello and welcome back, everyone! Today I'm taking over the Drive By Crafts Blog today with a few Lawn Fawn stamps and lawn cuts. My inspiration for this card came from snow globes I made as a kid using baby food jars. 


Products

                                                            Lawn Fawn: How You Bean? Stamp Set

                                                            Lawn Fawn: How You Bean? Shaker Add-On Lawn Cuts

                                                           Lawn Fawn: Home For The Holidays Lawn Cuts

                                                          Lawn Fawn: Home For The Holidays Stamp Set

                                                        Lawn Fawn: Little Town Border Die
                                             

                                                                Lawn Fawn: Merry Messages Stamp Set

                                              Echo Park Paper Co: Christmas Delivery Paper Pad       
                                                                                                                   
Hero Arts: Acetate 5x6 Sheets

Happy Snow

How To
  • Starting with a 4.25" x 5.5" top fold cardbase
  • Cut pattern paper 4.25"x 5.5" and adhere to cardbase
  • Die-cut white cardstock, patterned paper and acetate sheet using Lawn Fawn How You Bean? Shaker Add-On Lawn Cuts to create shaker
  • Stamp front of shaker using Lawn Fawn How You Bean? Stamp Set, color with COPICS
  • Stamp Lawn Fawn Home For The Holidays car and two trees, die-cut and color with COPICS
  • Adhere acetate to back side of jar die-cut to cover "window", add 3D mounting foam to the backside of "window" creating a dam to hold snow and sequins
  • Die-cut Lawn Fawn Little Town Border and cut to fit jar cut out, adhere to patterned paper so as to be seen through the window
  • Add Happy Snow and sequins, remove backing from 3D mounting foam and close the shaker using the die-cut patterned paper
  • Stamp sentiment on banner die-cut adhere to card front using 3D mounting foam
  • Adhere car and trees to front of shaker jar, finish off with sequins


As always, thanks for joining us today!
Be sure to join us on:


Wednesday, October 4, 2017

Pumpkin Spice In My Latte


Hi and welcome, everyone! Today I'm over on the Drive By Crafts Blog sharing a little Pumpkin Spice Latte with you. 


PRODUCTS


How To
Die-cut kraft cardstock and two pattern papers with stitched circle dies, creating a frame with one of the pattern papers and 4.25" x 5.5" pattern paper to create window(plaid paper shown above)

Using a stamping tool, stamp Pumpkin Spice on kraft paper using Distress Oxide Inks, stamp sentiment on frame using black ink

Add twine and adhere plaid paper using fun foam; inlay Kraft cardstock in plaid paper; add frame and finish off with enamel dots


As always, thanks for joining us today! 
As always, thanks for joining us today!
Be sure to join us on:

Wednesday, September 27, 2017

Happy Halloween with Drive By Crafts


Hi and welcome, everyone! I can't believe we are creeping into October. Have you finished your Halloween cards or just starting them? Here's one I just finished featuring a few of the new Lawn Fawn add-on sets and the How You Bean? Stamp and Lawn Cuts. 


PRODUCTS


HOW-TO
Starting with an A2 (4.2"x.5") top fold card base 
add single candy corn to acrylic block, add gray ink and stamp off on scrap paper, then stamp to card base, repeating that process until your happy with the background; stamp sentiment across top of card(see photo below)

Using Lawn Fawn How You Bean? Stamp and Lawn Cuts Set create jar by stamping, die-cutting and coloring, assemble to create shaker, don't forget to die-cut a piece of Hero Arts Acetate to create the cover for the shaker and stamp the inside of jar with How You Bean? Candy Corn Add-On Stamp Set and color with orange, yellows, and light gray; fill shaker with yellow, orange, and white sequins

Die-cut gray cardstock to create banner and stamp "halloween" sentiment from the Happy Happy Happy Add-On Stamp Set; die-cut Black Licorice cardstock using the Happy Happy Happy Add-On Lawn Cuts "happy", adding embossing ink and Hero Art Ultra Fine Embossing Powder, heat set

Adhere jar using liquid adhesive and banner with 3D mounting foam 


As always, thanks for joining us today!
Be sure to join us on:

Wednesday, September 13, 2017

I Love You More Than Candy Corn!


Hello, everyone. Lisa here with you today. This is my first post with Drive By Crafts and I'm so excited to be here. Today I'm sharing a card featuring Lawn Fawn's How You Bean? Candy Corn Add-on Stamp Set.


CARD BASE
A2 top fold white card base
Cut Lawn Fawn Black Licorice cardstock to 4.25" x 5.5" and adhere to card front

STAMP
Stamp Lawn Fawn's Candy Corn Add-on on white cardstock, color images with Orange and Yellow with markers, watercolors, or pencils, die-cut or fussy cut
Stamp sentiment from same stamp set onto die-cut white cardstock using black and orange ink

ASSEMBLE
Add 3D mounting foam to back of white cardstock and stamped images

 Arrange and adhere to cardbase
Finish off by adhering sequins in white, orange, and yellow 


Thanks for joining me today! 

Be sure to join us on:

Sunday, August 13, 2017

Just For You


Happy Sunday, everyone and welcome. Today I'm over on the Victorine Originals Blog sharing a simple design that reminded me of some of my first cards minus the sequins, of course. Do you ever look back at past projects to see how far along you've progressed? For me the difference is night and day.  

Using the Victorine Originals Just For You sentiment and Flowers stamp, I stamped the image  and sentiment with Versafine Onyx Black Ink, add a little color with Zig Pens, die-cut an oval to frame image, adhered with 3D mounting foam, finished off with sequins. So simple, just the way I like it lately.


As always, thanks for joining us!

Be sure to check us out on
Facebook and Instagram.

Friday, May 29, 2015

Seeing Stars with SVG Attic


Thank Goodness It's Friday! 
Today I'm sharing a few cards I created

SVG Attic Festive Fourth, Star Card, The Crafting Cave
I love this file because you can use it for more than
the 4th of July. Don't get me wrong, I knocked out four 
Independence Day cards in no time but it's nice knowing 
you can do more. And talk about double duty, using the star cutouts 
and the negative cutout for shaker cards is amazing! 


Here's the cards I created and the full list of supplies.
SVG Attic Festive Fourth, Star Card

SVG Attic Festive Fourth, Star Card, The Crafting Cave

SVG Attic Festive Fourth, Star Card, The Crafting Cave

I hope you have an amazingly crafty weekend! 
And remember....

“Be silly. Be honest. Be kind.” 

-Ralph Waldo Emerson-

Monday, January 12, 2015

Atlantic Hearts Sketch Challenge #90


Good Morning, Monday!
coming at you today! 

Are you ready to be inspired
by another awesome Atlantic 

Hope so! 
 Here's this weeks sketch and my take on it.
http://www.atlanticheartschallenge.blogspot.com/


Now it's your turn to show us your take on 
this awesome sketch. Hop over to 
this week. 

Monday, November 17, 2014

Flying By and Atlantic Hearts Sketch Challenge #82


It's Monday and you know what that means!

 And I made a card using Kraft cardstock, vellum embossed with 
Darice Clouds Embossing Folder and colored with Copic, Lawn Fawn Stamp Set ~ Flying By,
and finished it off with Twine from Paper Trey Ink.
This is one of the cards I will be sending 
to the Sunshine Foundation this month.
