Showing posts with label SVG Attic. Show all posts

Friday, February 1, 2019

Love A Good Boot!


Hi, and welcome everyone. Today I'm over the SVG Attic Blog sharing a fun Valentine's Day card.
Using the Witches Boot Card from the Bewitched Boutique Kit. I love this boot because it can be used for so many things. I did a Birthday Version that you can see here


Every product I used is from my stash. The patterned paper is old Martha Stewart paper, the red twine is, of course, Trendy Twine, the cute little fuzzies are Queen and Co. This card is super easy to cut and assemble. The word LOVE is from the Love Potion #9 Label.

s always, thanks for joining us! 
New to SVG Attic? Check out these places!
SnapDragon Snippets 

Friday, January 18, 2019

Love


Hi and welcome, everyone! 

Today I'm over on the SVG Attic Blog!

I have Valentine's Day card to share with you. I meant what I said in my last post about getting out in front of it. I'm Frankie Hecking it! I used the Cupid Hearts Teepee card. Don't be fooled, this card is super easy to make. I was very pleasantly surprised by the ease of it.  


To create the teepee card I started with Kraft and Red Coverstock to cut the base and accent elements.  I used white cardstock to cut the banner and the heart accent behind Cupid. I ran the red accents pieces through my BigKick in a heart embossing folder.


 I inked the accents pieces so the embossing would stand out a bit more. I added gold gilding flakes to the heart accent piece and inked the bare spots with pink ink. 


It's just a matter of assembling the card and adding final touches. I used 3D mounting foam behind Cupid, heart accent, and the scalloped round accent piece. Yep, it's that easy. 

Thanks for stopping by! 

As always, thanks for joining us! 
New to SVG Attic? Check out these awesome places!
SnapDragon Snippets 


Friday, December 7, 2018

Sleigh Bells


Hello and welcome, everyone! 

Today I'm over on the SVG Attic Blog sharing another Christmas project. I've paired two amazing sets to create my project for today and I'm so excited to share it with you all. 

I paired the sleigh from CG Nutcracker Dream Set with the candles and greenery from the Centerpiece Tray with Candles and Greenery Set


 I used 12 x 12 Kraft cardstock, lined it with Alexandra Renke Washi Tape for the sleigh accent pieces while the Silhouette cut the sleigh. I repeated the process for the candles. I let the greenery cut while I started assembling the sleigh. Once the greenery was cut and assembled, I used floral wire to create two bunches one larger than the other to arrange around the candles. 

 I used the Silhouette to sketch the sheet music and title, then rolled and hot glued into place. 

 The red berries are from Christmas picks I had in my craft room. 
I'm sure a few are wondering why the silver and gold sleigh bell. It's a little nod to my dad. Every year when Burl Ives comes on the radio singing Silver and Gold my dad belts out the lyrics, "Silver and gold, silver and gold".  Memories that I cherish. 

Thanks for stopping by! 

As always, thanks for joining us! 
New to SVG Attic? Check out these awesome places!
SnapDragon Snippets 


Friday, November 9, 2018

Thankful with SVG Attic


Happy Friday and welcome back! Today I'm over on the SVG Attic Blog sharing three cards I created using Wheat Stems Thankful, Flourished Acorn Tile, and the Pilgrim Suit a6 files. 


Wheat Stems Thankful is an a7 card that is so easy to cut and assemble. I used Echo Park plaid paper and Tonic Studios Specialty Champagne Harlequin paper. 


Using the Flourished Acorn Tile sized down to fit a 5 x 5 navy card base and created a shaker card. I used the Tonic Studios Specialty Champagne Harlequin paper. 


This a6 is so adorable and so easy to assemble. This is a perfect card for kids to help with. I used the Tonic Studios Champagne Harlequin paper for the buckle, with gray, white, black cardstock and a kraft card base. 

Thanks for stopping by! 

As always, thanks for joining us! 
New to SVG Attic? Check out these awesome places!
SnapDragon Snippets 


Friday, October 26, 2018

Happy Holiday Poinsettias


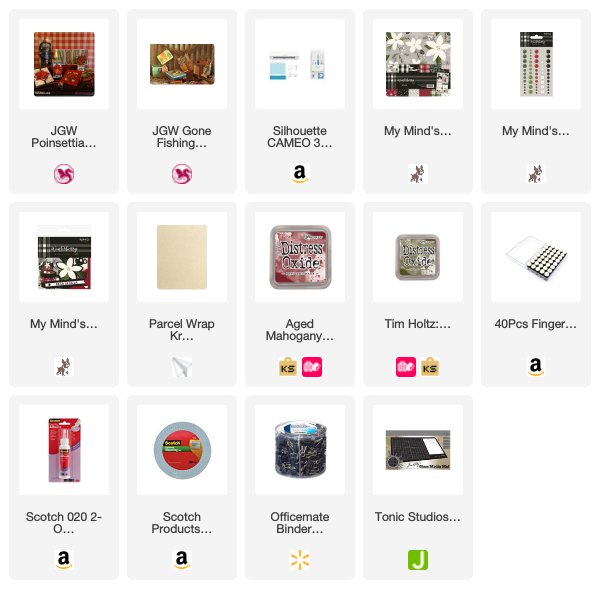
Hello and welcome back, everyone! Today I'm over on the SVG Attic Blog spreading Christmas joy. Can you believe we are five days away from November? I decided to get a head start on Christmas starting with a card and gift box featuring these beautiful poinsettias from the JGW Poinsettia Passion Kit! I have to say that I love the poinsettias from this particular collection, they're easy to cut and assemble. I borrowed the box from the JGW Gone Fishing Kit.


You can find easy to follow tutorials on the Needles 'n' Knowledge Blog: Poinsettia Doily Frame Card and the Trout Jumping Gift Card Box


The card is a 6 x 6 card which is perfect for showing off that gorgeous poinsettia.


The box is 5 x 5 x 1.5 with a gift card insert and there's extra space underneath to add candy. This would be perfect for a co-worker who loves candles. A gift card to a candle shop and a small pack of votives. I assembled the box in less than 10 minutes, it's super simple. And I like to remind everyone about my favorite tip of using binder clips while assembling projects. It truly keeps your hands free and that keeps things moving along. 

I have to tell you the paper is My Mind's Eye -  Winterberry. It's so beautiful, I love the colors. 


As always, thanks for joining us! 
New to SVG Attic? Check out these awesome places!
SnapDragon Snippets 


Friday, September 14, 2018

Halloween Fun


Happy Friday! Today I'm over on the SVG Attic Blog sharing a few Halloween projects from the JGW Halloween Soiree Collection


 I dressed the BOO up a little bit with Silver Gilding Flakes. I use spray adhesive to add gilding flakes, it works like a treat. I added 3D mounting foam to the back of each letter. I love that I went with a black and white theme. That seems to be the thing in my house right now. I added a piece of vellum to each box. My crafty girl, MaryAnn, suggested the vellum. I keep her around for a reason. LOL


Earlier this year I ordered the new Echo Park Paper Kits - Bewitched Collection. I used it for all the projects shown in this post. The easel card is a perfect card base for adding your own embellishments, this card base is a must-have in my book. 

I used the easel card and resized the mat that's included in the file. I also cut a mat for the inside of the card to place my sentiments(stickers) on.


As always, thanks for joining us! 


Friday, June 22, 2018

Don't Get Hooked!


Happy Friday, everyone and thanks for joining me on the SVG Attic Blog. Today I'm sharing two fun projects that are perfect for the "fisher-person" in your life. I used artificial baits to decorate the hat and card. Hence, don't get hooked!  


I started with the Fishing 3D Bucket Hat. This hat is so cute and super easy to put together. I thought I might toss a few pieces of candy or a pack of cashews in the hat.  You could even put a pack of hooks and a small bobber in it. 


Of course, you have to have a card to celebrate a birthday. So I created the Fishing Vest A7 Card and Envelope


I used Jelly Bean Green 12 x 12 100lb cardstock and a piece of 12 x 12 Jillibean Soup patterned paper from my stash to create the pockets, the band on the hat and as an accent piece on the envelope flap. To cut the pocket flaps and "gone" I used a scrap piece of 12 x 12 red paper. 
I had to add the recipients initials on the vest. 

I really enjoyed creating these pieces and I know my "fisher-person" is going to like them, too. 
He better or else!

As always, thanks for joining us today. 

Friday, May 11, 2018

MOM


Hi and welcome, everyone!Today I'm taking over the SVG Attic Blog today with a few Mother's Day projects and as always, they are quick and simple.  


I used the Mothers Day Flower Step Card  and Lacy Loop Flap A6 Envelope along with the Tall Box with Lid to create a gift box.  

I only used a few extras from the card because I am a CAS girl. So cut the card base, the panels to cover the card base, the flower, and lace accent pieces and adhere to card. I die-cut the MOM using a die from stash. I added 3D mounting foam behind the three flower petals and the die-cut mom to pop them up. Finished off with coordinating enamels dots.
The envelope was cut using the same paper and put together with Scotch Quick Dry Adhesive.


For the box I cut the sides, the bottom, the lid and extra layers out of the same patterned paper and pieced together with quick dry adhesive. I typed MOM on my cutting mat in the SDS and laid over the accent panel that comes with the box, clicked create a compound path then cut. Once I cut the panel I added 3D mounting foam to the back of the panel and added pink shimmer cardstock behind it. I added a flower to the lid for a "handle" from my stash. 


The paper is from the Recollections Backyard Table 12 x 12 Paper Pad. 

I'm wishing you a Happy Mother's Day. 
And as always, thank for joining me. 

Friday, April 27, 2018

Baby Boy Wardrobe


Hi and welcome, everyone!
 I'm over the SVG Attic blog today with my take on this amazing Wardrobe 3D Box.  As soon as I saw this wardrobe I knew I wanted to do for a Baby Shower.  You could easily make an album and place a gift card in the drawer, so cute! 


The paper is About A Little Boy by Photoplay. That adorable giraffe was meant for this wardrobe. While I was putting this together I thought how amazing this would be with a wind-up music box in it, #craftygoals, is all I can say at this point. 


I used a Tim Holtz Ideaology Curio Knob, Ornate Plate on the top, and a Keyhole. I used a lot of the stickers from the paper kit and popped them up with 3D mounting foam. A tiny bow with Trendy Twine. 
How would you use the wardrobe file? 


As always, thanks for joining me and have a great weekend.

New to SVG Attic? Check out these awesome places!
SnapDragon Snippets 
SVG Attic Facebook Page
SVG Attic Fanatics Facebook
SVG Attic Blog
SVG Attic Pinterest