Showing posts with label Washi Tape. Show all posts

Friday, December 7, 2018

Sleigh Bells


Hello and welcome, everyone! 

Today I'm over on the SVG Attic Blog sharing another Christmas project. I've paired two amazing sets to create my project for today and I'm so excited to share it with you all. 

I paired the sleigh from CG Nutcracker Dream Set with the candles and greenery from the Centerpiece Tray with Candles and Greenery Set. 


 I used 12 x 12 Kraft cardstock, lined it with Alexandra Renke Washi Tape for the sleigh accent pieces while the Silhouette cut the sleigh. I repeated the process for the candles. I let the greenery cut while I started assembling the sleigh. Once the greenery was cut and assembled, I used floral wire to create two bunches one larger than the other to arrange around the candles. 

 I used the Silhouette to sketch the sheet music and title, then rolled and hot glued into place. 

 The red berries are from Christmas picks I had in my craft room. 
I'm sure a few are wondering why the silver and gold sleigh bell. It's a little nod to my dad. Every year when Burl Ives comes on the radio singing Silver and Gold my dad belts out the lyrics, "Silver and gold, silver and gold".  Memories that I cherish. 

Thanks for stopping by! 

As always, thanks for joining us! 
New to SVG Attic? Check out these awesome places!
SnapDragon Snippets 


Wednesday, January 11, 2017

Party Like A Monster


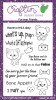
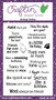
Hi, and welcome, everyone! Today I'm on the Craftin Desert Divas Blog bringing you the CDD Daily Post. Who doesn't want to Party Like A Monster? The Monster Mania Stamp Set is so cute, and the sentiments can be used for more than just birthdays. 


This is the perfect stamp set for boys.


Here are the products I used:

Image 1

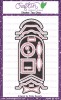
These SVG outlines will make cutting out your Monster Mania stamped images so easy. You must have a program that opens this format in order to use this file. This file contains the outline of the stamped images ONLY.STAMPED IMAGES ARE SOLD SEPARATELY.


Image 1


Image 1


Image 1


CARD BASE:

  • 4.25"x 5.5" card base 
LAYERS:

  • Using Silhouette Cameo, I cut Monster Mania SVG Outlines
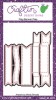
  • Die-cut flag banner 
STAMP:
  • Using the Mini Misti stamp image on X-Press Blend It Cardstock
  • Color using COPIC Markers
  • Using the Mini Misti Stamp sentiment on banner 
ASSEMBLE:
  • Decide placement of Monsters and adhere with 3D Mounting Foam
  • Add washi tape
  • Adhere banner to front of card base using 3D Mounting Foam

As always, thank you for joining us!
Affiliate Links are provided when available through ShareASale, Affiliatly, and CJ Affiliate. If you purchase through these links, I will earn a small commission at no extra charge to you.  I buy my products, and occasionally I do receive free products to review, and I will disclose that information when I do. 


Friday, September 16, 2016

Have A Mice Day!


Welcome, everyone! Today I'm on the Craftin Desert Divas Blog bringing you the daily post.
So, as soon as I received the new Flea Market paper pad I knew I had to use this cute little mouse from the Craftin Desert Divas Animal Antics Stamp Set along with the Have A Mice Day sentiment from the Fur-ever Friends Stamp Set.


I used Cloud Nine Washi Tape and Fall Flurry Washi Tape over white cardstock and die-cut with 
Flag Banner Dies. It's a great way to add fun elements to your projects. 

ASSEMBLE:
4.25" x 5.5" white #110 cardstock

LAYERS:
Die-cut plank background paper with largest Crazy Stitched Die
Die-cut mason jar paper with Tag Shaker Dies
Add Cloud Nine and Fall Flurry Washi Tape to scrap white cardstock
Die-cut with Flag Banner Die ( both Washi Tapes and one plain for stamping sentiment)

STAMP:
Stamp sentiment using Versafine Onyx Black ink
Stamp mouse using Memento Tuxedo Black straight on plank paper
Add a touch of color with C3 and R01 COPICS

ASSEMBLE:
Layer plank paper onto the white card base, add 3D mounting foam to the back of tag die-cut and arrange window over stamped image, layer banners over the tag, add 3D mounting foam to sentiment banner and adhere to other banners, finish off with enamel dots and tie twine on the tag.


Here are the products I used:


As always, thanks for joining us today! 


Monday, August 15, 2016

Craftin Desert Divas August Release


Be sure to join us today for a chance to win some amazing prizes. The more people going to this event (on Facebook, no travel required) the more prizes being given away! 

Monday, November 30, 2015

Christmas Tags with Eureka! Stamps Challenge Blog


It's official, Christmas is upon us! And this challenge is a wonderful way for you 
to get a jump on your Christmas Tags. I love making tags and I don't make them often enough.
So I had a lot fun creating this tag using Digital Image 23301 Package Stack from Eureka! Stamps. 
Just click the link below to find it and more.

Store
Eureka


Challenge Blog

Christmas Tags with Eureka! Stamps by Lisa In the Crafting Cave

To create this tag I colored the image with COPICs on Xpress It cardstock, I used Lawn Fawn's Tag You're It Die Cut and just extended the cut down my paper to give me a more elongated tag. All the papers are from American Crafts 6 x 6 Holiday Paper Pad with matching washi tape purchased at AC Moore. If you live near an AC Moore and love 6 x 6 Paper Pads, GO! At $2.50 a pad you can't go wrong plus they offer military discount of 15%!
 Finishing off with Jillibean Soup Adhesive Sequins.

Join us over at
EUREKA! STAMPS CHALLENGE BLOG
CHRISTMAS TAGS CHALLENGE #169