Showing posts with label Happy Birthday. Show all posts

Monday, July 15, 2019

Rainbow Balloons

Follow my blog with Bloglovin


Hi and welcome! How many nesting die sets do you own? And how often do you use the largest die in those sets? I was determined to start using those dies for my cards. The answer staring me in the face this whole time. If I die-cut one 6x6 piece of paper with a large die then cut it down the middle, I could not only use my large dies, but I could get two cards out of that one cut. 


I have a short video that walks you through the process of the "Rainbow Balloon" cards below.


Walk Through

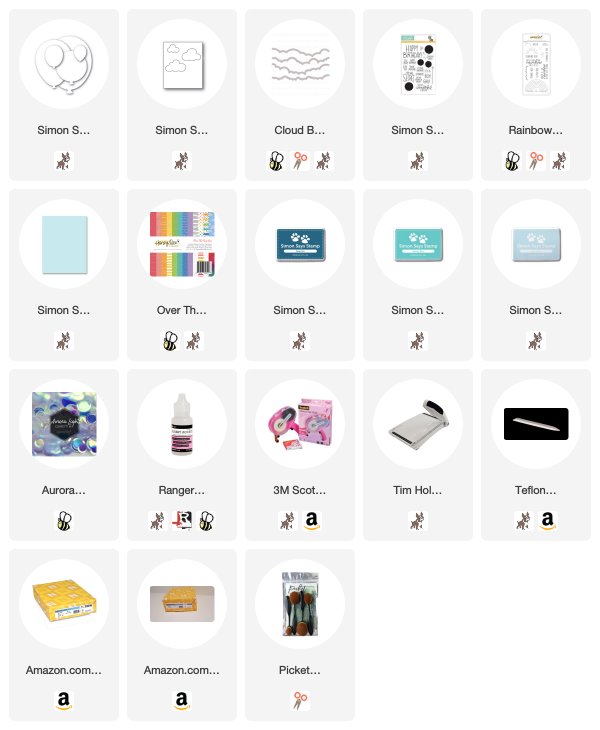
  • Die-cut patterned paper using large balloon die (it can be any large die you have), cut in half (long-length) with a paper trimmer.


For the balloon cards, I created an ink-blended background of clouds.
  • Place a stencil on a 4.25" x 5.5" card panel, add ink to blender brush(tool), with light pressure start applying the ink. I swiped the blender brush in an upward motion because this is printer paper and circular motions will bend the edges of the printer paper. I used Simon Says Stamp Ink in the colors Deep Sea, Audrey Blue, and Sea Glass. Die-cut or use your paper trimmer to cut the card panel down to 3.75" x 5." 
  • I created a stencil using the Honey Bee Stamps Cloud Borders Dies and printer paper.
  • Stamp Hugs, Kisses and Rainbow Wishes on one panel and Happy Birthday on the other making sure to stamp one on the left side and the other on the right side, the balloons will be on the edge of each card.
  • Die-cut or use a paper trimmer to cut  Sea Glass Cardstock to 4" x 5.25"; layer ink-blended backgrounds onto using a tape runner, adhere layered pieces to a 4.25" x 5.5" top fold cardbase. 
  • Add 3D mounting foam to the back of each balloon and tie a silver thread to the neck of each balloon allowing the thread to loop around the edges of the balloons adhering itself to the 3D mounting foam.
  • Adhere balloons to the edge of each card 
  • Die-cut small clouds using the Simon Says Stamp Picture Book Sky Background die, add 3D mounting to the clouds and adhere to cards. 
  • Finish off the cards with Honey Bee Stamps Carousel Lights Confetti.


Okay, I'm off to use those large dies! I hope you'll give this a try some time. 

I've entered the cards into a few challenges:


As always, thank you for taking the time to join me. 


Be sure to follow me on 


Be sure to check out my website, LisaMensing.com
Friday, June 22, 2018

Don't Get Hooked!


Happy Friday, everyone and thanks for joining me on the SVG Attic Blog. Today I'm sharing two fun projects that are perfect for the "fisher-person" in your life. I used artificial baits to decorate the hat and card. Hence, don't get hooked!  


I started with the Fishing 3D Bucket Hat. This hat is so cute and super easy to put together. I thought I might toss a few pieces of candy or a pack of cashews in the hat.  You could even put a pack of hooks and a small bobber in it. 


Of course, you have to have a card to celebrate a birthday. So I created the Fishing Vest A7 Card and Envelope


I used Jelly Bean Green 12 x 12 100lb cardstock and a piece of 12 x 12 Jillibean Soup patterned paper from my stash to create the pockets, the band on the hat and as an accent piece on the envelope flap. To cut the pocket flaps and "gone" I used a scrap piece of 12 x 12 red paper. 

I had to add the recipients initials on the vest. 

I really enjoyed creating these pieces and I know my "fisher-person" is going to like them, too. 
He better or else!

As always, thanks for joining us today. 

Wednesday, January 11, 2017

Party Like A Monster


Hi, and welcome, everyone! Today I'm on the Craftin Desert Divas Blog bringing you the CDD Daily Post. Who doesn't want to Party Like A Monster? The Monster Mania Stamp Set is so cute, and the sentiments can be used for more than just birthdays. 


This is the perfect stamp set for boys.


Here are the products I used:

Image 1

These SVG outlines will make cutting out your Monster Mania stamped images so easy. You must have a program that opens this format in order to use this file. This file contains the outline of the stamped images ONLY.STAMPED IMAGES ARE SOLD SEPARATELY.


Image 1


Image 1


Image 1


CARD BASE:

  • 4.25"x 5.5" card base 
LAYERS:

  • Using Silhouette Cameo, I cut Monster Mania SVG Outlines
  • Die-cut flag banner 
STAMP:
  • Using the Mini Misti stamp image on X-Press Blend It Cardstock
  • Color using COPIC Markers
  • Using the Mini Misti Stamp sentiment on banner 
ASSEMBLE:
  • Decide placement of Monsters and adhere with 3D Mounting Foam
  • Add washi tape
  • Adhere banner to front of card base using 3D Mounting Foam

As always, thank you for joining us!
Affiliate Links are provided when available through ShareASale, Affiliatly, and CJ Affiliate. If you purchase through these links, I will earn a small commission at no extra charge to you.  I buy my products, and occasionally I do receive free products to review, and I will disclose that information when I do. 


Thursday, September 8, 2016

Oh Nuts! I Forgot..


Hi and welcome, everyone. Today I'm up on the Craftin Desert Divas Blog bringing you the Craftin Desert Divas Daily Post today. Using the adorable Acorn Die-Cut from the Autumn Wishes Dies I created this very CAS belated birthday card. 


With just a little die-cutting, you will have this card at the post in no time. 

Die-cut banners, acorns, white squares, adhere Kraft cardstock to the white card base, stamp sentiment, and adhere die-cut pieces. I stamped the sentiment "your birthday" and a few acorns on the inside. 

I love how the patterned paper gives it an elegant look while the sentiment keeps it light-hearted.

Here are the products I used:


PLEASE VISIT MY WEBSITE THE RELATIVITY OF PAPER  FOR ALL DETAILS. 

Friday, April 17, 2015

"Happy Birthday Shoes" with Lisa Mensing


Happy Friday everyone! 
Today I want to share a Gift Bag and Birthday card
I created using two amazing files from 
SVG Attic

http://www.svgattic.com/

 SVG Attic Basic Gift Bags and Bewitched Boutique

I love working with SVG Attic files because you 
can use one file so many different ways. 

So I started with the handled tall gift bag from 
the Basic Gift Bags SVG Collection. The bags in this set can be used for 
anything and you get six different bags. If you're a bag hound like me, you'll love this
set. 

The birthday card is made using the Witches Boot card from the
JGW Bewitched Boutique Set. Ladies, if you have BFF's that love shoes 
you can't go wrong with this set. That one boot file can be used for any 
kind of card, the possibilities are endless.


Using the same two files, I created a small scalloped gift bag with
a boot tag

Be sure to hop over to the SVG Attic Blog and check out 
all the amazing designs by the very talented I-Team!

Monday, February 2, 2015

Happy Monday with Atlantic Hearts Sketch Challenge #93


Hello, hello crafty friends!
I hope you all had a wonderful weekend 
and your week is off to a fabtabulous start!

To start your week right, hop over to 
and join us for 


 For this card I used a Jolee's Boutique Dimensional,
Cream Floral. I found it marked down at Walmart
and thought I would give it a go. 
Maybe, I should have picked up more than one.
All the papers are die cut using Spellbinders 
Radiant Rectangles.  Just layered 
it all up, popped the sticker on 
stamped the sentiment and finished it off with 
Queen & Co. Pearls!

So I hope you join us for another 
great sketch over at 
ATLANTIC HEARTS SKETCH CHALLENGE.
While you there checkout all the amazing 
inspiration created by the 
amazingly talented design team.

Monday, November 17, 2014

Anything Goes/Optional Twist Use Glitter ~Get Creative Challenge #2


Good Morning! This is my first posting for the NEW
 challenge blog, GET CREATIVE!
There are a lot of great challenges lined
up with amazing sponsors! 
Angie has out done herself putting this 
challenge blog together for you!
Let's give her a round of applause!
(clap,clap,clap)

This weeks challenge is 

 I had the pleasure of using this amazingly adorable digi by 

 How cute is she? I colored the image with 
Copic Markers and used bits and pieces of scrap 
papers. I cut the banner from one of the scraps and 
glittered it up for the optional twist.

http://linnie-whoopsiedaisy.blogspot.com/
and at
Ruby Red Crafts

You can check out the blog too!
http://cutedaisymay.blogspot.com/


is our sponsor for this challenge.
Offering two sheets to the lucky winner!
So, hop on over to Get Creative Challenge Blog and join in for 
a chance to win!