Showing posts with label Summer. Show all posts

Saturday, July 27, 2019

Good Vibes


Hi, and welcome! Today I'm sharing a card created with the Tropical Vibes Stamps and Dies along with a few other products you can find listed below. Have you ever made something and thought to yourself, this is my thing? Well, I've decided black and white backgrounds are my thing. There's something about the way it makes everything come to life. Anyway, I hope you like it as much as I do. 


VIDEO TUTORIAL 


WALKTHROUGH 


Stamp turnabout stamp using Versafine Onyx Black ink.  

Die-cut the "good vibes" sentiment in gold glitter.


Die-cut three more layers using white cardstock, I used Couture Creations DieCut N Bond before die-cutting to make stacking easier. You only need to peel the back off the adhesive and stack.


Die-cut one piece of Vellum and one piece of turquoise cardstock using a circular die. (size personal preference)

I glued the gold glitter to the white cardstock. Only because I didn't add the DieCut N Bond adhesive
(I wasn't thinking) Add the stacked "good vibes" to the die-cut Vellum


Using a 3D mounting foam adhere the Vellum to the turquoise cardstock. 


Die-cut six of the palm leaves (vary the sizes) using green cardstock, cut two frond palm leaves using green vellum, cut flowers using pink and yellow cardstock.


Cut the stamped panel down to a 5.25" square. Cut all four sides to keep the pattern balanced. 


Center stamped panel on a 5.5" square card base.


Arrange die-cut pieces and glue in place. Use 3D mounting on the flower to pop them up off the cardbase. 


Add a few sequins and call it a day! Super simple. 


Thanks for joining me.
 I hope you are inspired enough to head to your crafty space and create something amazing today! 
Be sure to head over to the website and become a subscriber, so you have access to my videos before they are published to the public. Did you know that every time I send an email to my subscribers a name is picked from my active subscribers to win a little something? 

www.lisamensing.com


Be sure to follow me on 

Thursday, July 25, 2019

Hello, Toucan Paradise


Hi, and welcome back? Today's is all about the Toucan Paradise Stamps and Dies from Concord & 9th. Just released earlier this month, I decided I would give it a try, and I'm not regretting that decision at all. This card screams summer fun to me, and for some reason, I am all about the summer fun this year. As some of you may know, I'm all about the stamping, too. I like coloring but give me a solid image and some colored inks, this girl is in heaven.Oh, and did I mention, I've decided my new thing is black and white. I love black and white with gorgeous pops of coloring. Who knows maybe I found that one thing I will be known for. Okay, without further ado, here's a quick video tutorial for you. Not a fan of videos scroll past the video, and I will have a walkthrough for you.


VIDEO TUTORIAL


WALKTHROUGH
Stamp the body of the toucan using black ink.

Die-cut the stamped body.

 The beak is two stamps; start with the large section first.

Stamp the large section with green ink.

Stamp the second part of the beak with black in

Using the Gina K. Designs wreath builder to stamp a background.

Stamp the palm leaves with green ink.

Stamp the frond palm leaves with a darker green ink.

Stamp the largest flower with pink ink and the smaller flower with orange ink.

Stamp the breast details using yellow ink.

Stamp the palm leaves again with black ink. See photo below.

Fill in white spaces by stamping small details using blue, yellow, and gray ink.

Die-cut the branch from gold glitter paper.

Use foam strips to adhere to the branch to the front of the card. 
Add 3D mounting foam to the back of the toucan and adhere over the branch to the front of the card panel.

Finished 4 x 4inch panel.

Stamp edges of a 5x5 inch card base with detail stamp and black ink.

Add 3D mounting to the back of the stamped 4x4 panel and center to the front of the cardbase.

Add sequins using glossy accents.

Stamp sentiment in the lower right corner using black ink. Touch up with black pen if necessary. 
I love the way this card turned out.


Thanks for joining me.
 I hope you are inspired enough to head to your craft area
 and create something amazing today! 


Be sure to follow me on 


Disclosure: I purchase all my products through the companies listed on my website and blog. I will not bash a company or its products; however, I refuse to promote any company that has a lousy product, lousy customer service, or nasty owners. I do not offer paid endorsements. I will never recommend a product that I would not buy again. I do use affiliate links for some of the companies but not all. Affiliate links provided are for your convenience, at no extra charge to you. I will earn a small commission if you choose to buy through my affiliate links. That small commission helps to cover the cost of the website and my supplies. I'm so blessed to be able to share my love of crafting with you.

Wednesday, July 24, 2019

Summer Squeeze


Hi, and welcome back! Today's post is filled summery goodness and gorgeous layered lemons. Black, white, and yellow are one of my favorite color combinations. When I saw the Lemon Blossom Stamps set from The Greetery I knew it would be perfect to create Summer cards in the black, white, and yellow color combination.


These cards are so easy to create using that amazing Gina K Designs Wreath Builder. I'm in love with this thing, honestly.

VIDEO TUTORIAL


As always, thank you for taking the time to join me. 


Be sure to follow me on 


Friday, May 31, 2019

Have A Sweet Day with Wonky Die Cuts


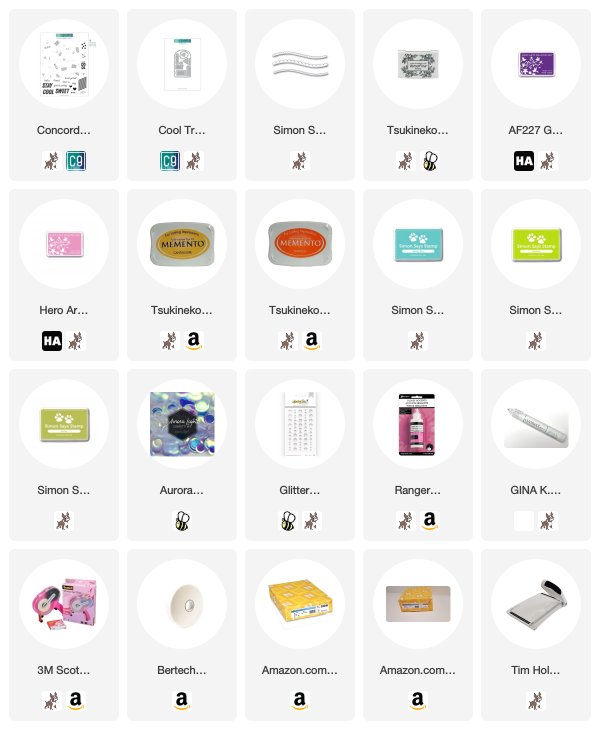
Hi and welcome everyone! Today I'm sharing four "cool" cuts featuring Concord & 9th Cool Treats Turnabout Stamps and Dies plus we explore wonky die-cuts to add movement to our cards. 

I've never been a purple girl, but I have to say Hero Arts Grape Juice ink is changing my mind! 


                                 How sweet are these popsicles and snow cones?


VIDEO TUTORIAL 


Friday, July 20, 2018

Imagine + New Mood Board Challenge


Hi, everyone! Today I'm sharing a card I created using Raisin Boat's Imagine Stamp set, inspiration courteous of the new SumMore Fun mood board challenge.  Here's the mood board and I hope you'll join in the fun.

And here's my take on the mood board.


HOW TO 

  • Stamp the butterfly with Memento Inks in Tangelo, Dandelion, Grape Jelly and Pretty Posies
  • Use the small detail stamp of outlined circles I stamped around the butterflies after masking them using Memento Inks Paris Dusk, Summer Sky, Zeal Teal and Danube Blue.
  • Added a little texture with stencil paste and stencil around the edges.  Stamped the sentiment using a green ink from stash and die-cut, added 3D mounting foam and adhered to card panel
  • Finished off with matching enamel dots on each butterfly. Add fun foam to the back adhere to a 4.425" 5.5" - 110lb card base. 


SumMore Fun Blog has a bi-weekly mood board challenge, play along with the colors, the photos or just use the whole board. Hey, maybe you want ice cream on a boat, who knows! All we know is we can't wait to see what you create and maybe, you'll be the lucky winner of a $20 shop credit with SumMore Fun Online Store. 

 Raisin Boat Imagine


So now it's your turn to show us your take on the mood board. You have until August 2nd to link up.

Be sure to use the discount code LISA10 during checkout to receive a 10% discount.

And as always, thanks for joining me today. 
New to SumMore Fun?
Check out the 
SumMore Fun Store
SumMore Fun Blog
SumMore Fun Facebook Page
SumMore Fun Instagram


Friday, July 13, 2018

Take Me Out to the Ball Game!


Happy Friday! Today I'm over on the SumMore Fun Blog sharing a card that's perfect for the Baseball fans in your life.


Using the colors from the current mood board I stamped the bat, glove, ball and music from the Victorine Originals Baseball Set using Red, Blue and Brown inks and cut out using Scan N Cut. Dry embossed Raisin Boat Bear Cub cardstock with star embossing folder and adhered to a 4.25 x 5.5" Raisin Boat Red Delicious cardstock base. Add 3D mounting foam to the cut out elements and arrange on front of card. Add white cardstock to inside of card and stamp with sentiment. 


Please be sure to join our current mood board for a chance to win. 


Be sure to use code LISA10 during checkout on the SumMore Fun Online Store for 10% savings. 

And as always, thanks for joining me today. 
New to SumMore Fun?
Check out the 
SumMore Fun Store
SumMore Fun Blog
SumMore Fun Facebook Page
SumMore Fun Instagram