Showing posts with label Trendy Twine. Show all posts

Friday, January 4, 2019

Sweetest Cottage Gift Box and Card


Hi and welcome, everyone! 

Today I'm over on the SVG Attic Blog sharing my first Valentine's Day projects of 2019.
I decided to get out in front of it this year. Christmas just flew by and I didn't get to enjoy all the wonderful things that Christmas brings, so much to do, so little time to do it. That's changing this year and if it means me working months in advance then so be it. 


My first Valentine's Day gift is super simple to create using the Cottage Ribbon-Tied 3D Gift Box. I used Kraft coverstock to cut the bottom and sides. Quick dry adhesive and few binder clips keep me working while this dries. Red coverstock to cut the top, using a heart embossing folder to add interest to that red coverstock. I swiped a Distress Ink Pad - Barn Door over the embossed hearts so they stand out a little more.  I'm using Trendy Twine Chevron Ribbon, love this ribbon, to tie the box closed. 
Using Doodlebug Valentine's paper, from years ago, I cut the heart-shaped accents and glue to the box with a quick dry adhesive.  To hold that pretty ribbon in place I used Trendy Twine Totally Red and Cherry Latte Baker's Twine. I used the negative from the heart-shaped accent pieces like charms. 

I decided to create a card to accompany the gift. Using the Valentine's Scrap Panel A7 card from the JGW Heartfelt Delivery Kit.  Using the same Kraft and Red coverstock as the box I cut the pieces for the card. I embossed the red coverstock panels with the same embossing folder and inked it with Distress Ink - Barn Door, too. Using a white gel pen I added dots to each heart on the card and box. I decided to bring the FEB 14 to life with white accents, too. To finish it off I attached sequins using glossy accents. 


Honestly, I felt a sense of relief as I finished my first Valentine's Day gift of 2019.

Thanks for stopping by! 

As always, thanks for joining us! 
New to SVG Attic? Check out these awesome places!
SnapDragon Snippets 

Saturday, November 17, 2018

Happy Birthday, Lesley!


Today we are celebrating Lesley's, the owner of Trendy Twine, birthday

HAPPY BIRTHDAY!

I hope your day is Magical!


I've been told Lesley is a huge fan of all things Disney! Of course, I knew exactly which direction to take because I too love all things, Disney! 


It also helps that I just happened to have Trendy Twine in Gray Licorice and Totally Red, perfect for Disney projects. I simply cut out balloons from Silhouette Library, used my sketch pens with the Waltograph fonts to create the sentiments, colored them in with a 110 Copic Marker and added a little white with a gel pen. I did cut two holes out of the cardstock using my Silhouette to run the Trendy Twine through. I'm using #110 solar white coverstock for the card base and ran Mickey Mouse Washi tape along the edge completely. Stamped random stars around the balloons in matching colors. 


I think the message inside sums it up! Let's face it if your birthday is that magical, well, you had an amazing birthday! 

Be sure to hop over to the Twine It Up Blog and leave Lesley a magical birthday wish! I know she would love that! 


Monday, October 29, 2018

Winter Wonderland


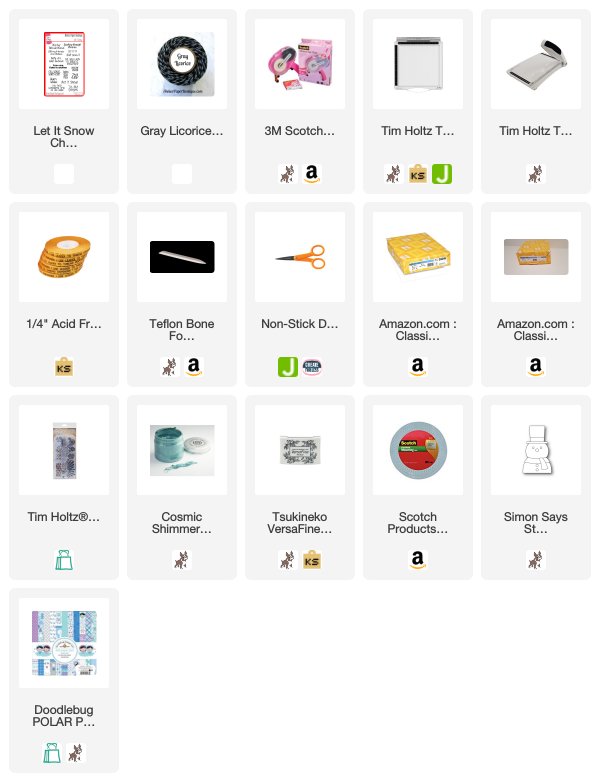
Welcome back, everyone! Today is my last day guest designing over on the Twine It Up Blog. Since we are heading into the holiday season I want to share a holiday/seasonal card. I'm using the Let It Snow Stamp Set along with Trendy Twine in the color Gray Licorice. 


This month has been a blast on the Twine It Up Blog and I found myself reaching for products that I rarely use. I should use them but we sometimes find ourselves getting comfortable in our ways, even crafting. As I sit here writing this post what I want more than anything is to be in my craft room with a few stencils and shimmer paste. I love that stuff. 


To my surprise, I don't own a snowflake stencil, wha?! Okay, grab a stencil that looks like falling snow. YES! I have one of those. And that's how this whole card started. It's super easy to do. 
Using a heavyweight coverstock, you know that #110 stuff, add shimmer paste over a stencil and pretend your icing a cake. Hey, it's what I do.  Set the card panel aside to dry and clean up stencil and spatula. Die-cut or stamp a snowman, put the snowman together or color if you stamped. Using patterned paper and the Let It Snow Stamp Set stamp sentiment using black ink, cut at an angle the patterned paper and a scrap piece of paper, want the angles to be exact? Cut the patterned paper and scrap on the angle together, then cut the length on the opposite ends. Use the scrap piece of paper to wrap twine around. Adhere patterned paper right below twine, add snowman with 3D mounting foam, finish the snowman off with enamel dots. Add 3D mounting foam to the back of the stenciled card panel adhere to a 4.25" x 5.5" top-fold card base. Add patterned paper/snowman to the bottom of card panel using 3D mounting foam. 

Products I used from Annie's Paper Boutique:
Gray Licorice Trendy Twine
Let It Snow Stamp Set

Thanks for stopping by. 

If you are new to Trendy Twine, you will want to check out these fun places:
Shop for Trendy Twine HERE
Follow Trendy Twine on Facebook


Wednesday, October 24, 2018

Black and White Cards


Hi and welcome, everyone! 

Today I'm over on the Twine It Up Blog sharing black and white cards featuring one of October's Showcase Products, Gray Licorice Trendy Twine. Since I'm featuring Trendy Twine that is gray and black I thought black and white cards would be perfect and it gives me a chance to show you how easy these cards can be. 


The Happy Thanksgiving Stamp Set has a lot of thankful sentiments that can be used year round. 
I decided to work with the So Thankful sentiment. This is a great guy card and super simple.

I laid black in down on an embossing folder, inserted a 4.125" x 5.25" white cardstock, carefully close the folder and run through Big Kick. Tip: If you lay the cardstock on the opposite side of the ink and secure it with post-it tape you can re-ink the embossing folder and run it back through if you need to.
Die-cut a piece of black cardstock to fit the sentiment; lay down some anti-static powder on black cardstock, stamp sentiment using VersaMark and heat set white embossing powder. 
Add fun foam to the back if the embossed white cardstock, wrap Gray Licorice Trendy Twine and tie a knot, adhere to a 4.25"x5.5" card base, add the sentiment over twine using 3D mounting foam, finish off with a few clear sequins.

___________________________________________________________

This next card is just die-cutting white cardstock, layering it over black cardstock, stamp the sentiment on the bottom right corner, offset the bottom half of the die-cut and add 3D mounting foam, wrap Gray Licorice Trendy Twine around securing in place on 3D mounting foam, adhere to card base. I just iridescent drops to finish off the card.  
The sentiment can be found on the Let It Snow Stamp Set. This set has a lot of great sentiments.


________________________________________________________________


I did the same process of adding ink to an embossing folder and running it through the BigKick. 
I used white ink on black cardstock and ran it through several times each time adding more ink. I love the way the ink pulled giving it a crackled look.  I decided to add clear embossing all over the white ink and heat set to really bring out that crackled look. 


I wrapped the Gray Licorice Trendy Twine around the card base, added 3D mounting foam to the back of the embossed black cardstock, stamped the Happy Thanksgiving sentiment from the Happy Thanksgiving Stamp Set. So easy. 


Products I used from Annie's Paper Boutique:
Gray Licorice Trendy Twine
Happy Thanksgiving Stamp Set 
Let It Snow Stamp Set


Thanks for stopping by. 

If you are new to Trendy Twine, you will want to check out these fun places:
Shop for Trendy Twine HERE
Follow Trendy Twine on Facebook


Friday, October 19, 2018

Trendy Baker's Twine - Boo!


Hello and welcome back, everyone! 

Today I'm over on the Twine It Up Blog sharing a few ghostly cards! 


Today I'm sharing cards featuring the Happy Halloween Stamp Set and one of this month's feature products, Gray Licorice Trendy Twine. 

I'm sure we all find ourselves needing a quick card? I love sentiment stamps because you can create a quick background with very little effort and produce adorable cards. 

To create the cards above I stamped "BOO" along the bottom half of a 4.25" x 5.5" piece of cardstock, decided on the position of the cardstock and then cut it, the top half of the cardstock is cut down to fit the front of our card allowing for a reveal between the top and bottom pieces. Wrap Gray Licorice Trendy Twine around your card base where you plan on placing the reveal and stamp the sentiment across the trendy twine with white ink. It's transparent giving a ghostly effect. I decided to add a little interest by dry embossing cobwebs using my BigKick and scored a line between the cobwebs and BOO sentiment. Add 3D mounting foam to the back of the two pieces of cardstock and adhere to a 4.25" x 5.5" top-fold card base. I finished off the cards by including a die-cut ghost and a few clear iridescent sequins. 

For the second card, I used the same process and stamped Hello Boo-tiful alternating Distress Oxide Inks - Carved Pumpkin, Twisted Citron and Wilted Violet.


Products I used from Annie's Paper Boutique


Thanks for stopping by. 

If you are new to Trendy Twine, you will want to check out these fun places:
Shop for Trendy Twine HERE
Follow Trendy Twine on Facebook


Monday, October 15, 2018

Trendy Baker's Twine - You Are Spooktacular


Hello and welcome, everyone!

Guest Designer, Lisa from The Relativity of Paper. I'm super excited to be sharing another fun sweet treat project showcasing the October's featured products, Gray Licorice Trendy Twine and Skinny Candy Chutes.  


This treat holder makes a sweet gift for teachers, kids or someone in the office. Skip the envelope with this one and place it on a desk or counter. The recipient will have a nice Halloween surprise waiting for them. 


This is such an easy project. I have a pictorial below. 

You will need a 7.75"(H) x 8.25"(W) in. heavy cardstock for this project. I recommend at least #80 lb, that's what I used. 

Lay the paper horizontally on scoreboard and score at the .75", 1.5" and 2.25" marks. Set aside. 
Die-cut the top of the pattern papers, align and adhere together. Trim so the pattern papers are 8.125" (W). Set aside.
Using a temporary adhesive or post- it tape center the pattern papers on the cover stock ABOVE the .75" score line. 
Flip the paper over on a paper trimmer and cut at 1.5", 2.25", 6" and 6.75" marks cutting from the .75" to the 2.25" scored lines creating straps. (See picture below) Make sure not to cut past those scored lines. 
Add a stronghold adhesive as shown in the picture above. Flip the paper over and permanently adhere the pattern papers. Be sure to never add adhesive over the cut lines, they need to be able to move freely. Flip back over and fold on the .75" score lined up, adhering it to the back of the next section. 
Score the cover at 4.25" and fold to create the card. 
You should be able to slide a skinny candy chute into the two straps on the front of the card. 

Add candy to the Skinny Candy Chute, slide it into place and secure by wrapping Gray Licorice Trendy Twine around the candy chute and tie. I stamped the You Are Spooktacular sentiment from the Annie's Paper Boutique Happy Halloween Stamp Set on the inside of the card. 
Now the fun part, decorating the front of the card. And that brings us back to this. 


Products I used from Annie's Paper Boutique


Thanks for stopping by. 

If you are new to Trendy Twine, you will want to check out these fun places:
Shop for Trendy Twine HERE
Follow Trendy Twine on Facebook


Wednesday, October 10, 2018

Trendy Baker's Twine - Have a FANG-tastic Day!


Hello and welcome, everyone!

Today I'm over on the Twine It Up Blog sharing a fun way to send our crafty friends a few goodies for Halloween. Of course, this would easily translate to any holiday or celebration. 


The Treat Packets make quick work of this project and here's a fun tip: treat packets emboss beautifully! I laid each treat packet flat in an embossing folder and ran it through my BigKick. I die-cut two banners and stamped the sentiment, Have a FANG-tastic Day, from the Happy Halloween Stamp Set using black ink. I cut two bats using my Silhouette, added googly eyes, and just cut white fangs from scrap paper. I added Gray Licorice Trendy Twine to one of the bat's wings. Add a piece of 3D mounting foam to the back of each bat and adhere the die-cut sentiment banner, set aside. 


The treat packets come with small clear baggies that are perfect for adding a small candy bar or candy corn. I removed the packaging and staple from the Grape Licorice Batty Sequins and Orange Licorice Batty Sequins. The sequins come in the same small baggie that comes with the treat packets. I added the small paper spool of Trendy Twine in with the coordinating sequins and sealed it back up. Once you have the sequins, trendy twine and candy packaged place the baggies inside the treat packets to align, punch two holes through the treat packets and baggies, making sure to punch the holes above the seal on the baggies. Tie the treat packets closed with Gray Licorice Trendy Twine and adhere the bats with the attached sentiment. 


Products I used from Annie's Paper Boutique


Thanks for stopping by. 

If you are new to Trendy Twine, you will want to check out these fun places:
Shop for Trendy Twine HERE
Follow Trendy Twine on Facebook

Friday, October 5, 2018

Trendy Baker's Twine - Hand Over the Candy


Hello and welcome back, everyone! 

Today I'm over on the Twine It Up Blog as the guest designer for the month of October. I'm so honored and super excited to have this opportunity. 

This month's featured products are

I'm sharing a sweet treat and card combo. 


To create the sweet treat you will need a Skinny Candy Chute, painter's tape or washi tape, inexpensive paint brush, and orange, yellow and white chalk paint. 

Using tape, tape off 5 sections to be painted. Starting with orange chalk paint, paint the bottom section completely, paint half of the fourth section with orange, too. Blend yellow chalk paint into orange (fourth section) while the paint is still wet. Paint the third section yellow and half of the second section yellow. Finish off with white chalk paint blending white with yellow in the second section and completely paint the first section white. Let dry. Fill with candy corn. 


To create the card I used pattern paper from my stash with coordinating stickers, Gray Licorice Trendy Twine and Annie's Paper Boutique Happy Halloween Stamp Set.


I created the sentiment background paper simply by repeat stamping the sentiment in orange and yellow ink and stamped the "trick or treat" sentiment over it using black ink. All the sentiments are from the Happy Halloween Stamp Set. Set to the side. Mat a 4.25"x5.5" top-fold card with pattern paper, layer the stamped background paper using fun or 3D mounting foam. Using an edge die-cut cut a piece of pattern paper and adhere to the left side of the card. Add stickers using 3D mounting foam, adhere clear sequins and embellish with Gray Licorice Trendy Twine. Stamp Happy Halloween inside the card. 


Products I used from Annie's Paper Boutique


Thanks for stopping by. 

If you are new to Trendy Twine, you will want to check out these fun places:
Shop for Trendy Twine HERE
Follow Trendy Twine on Facebook


Friday, October 16, 2015

Ghostly Globe with SVG Attic


Happy Friday! Lisa here, from the The Crafting Cave,  ready to share another Halloween 
project with you. I used the Snowglobe Box from JGW Snow Flurries
Collection and 3D Ghost from SDS Ghostly Graveyard
I think this is a really fun way to give a little Halloween 
gift! There's plenty of room in the box to put candy, tea lights, gift cards and more.
Created In The Crafting Cave with Lisa SVG Attic JGW Snow Globe and SDS Ghostly Graveyard
I used The Paper Studio Jeepers Creepers 12x12 Papers, Craft Smith Neutrals 12x12 Paper, cream cardstock to assembly the globe and ghost. I punched a small hole in the back arch to hang the ghost from using Trendy Twin. Added Crate Paper After Dark Enamel Dots and Jolee's Boutique Stickers to finish it off. 
SVG Attic JGW Snow Globe and SDS Ghostly Graveyard
 The box holds an 11oz bag of Reese's Mini Peanut Butter Cups perfectly.
Just to give you an idea how big it is. I measured the globe at 8in. tall and about 5.5in wide.
SVG Attic JGW Snow Globe and SDS Ghostly Graveyard
This would be a perfect gift for teachers and/or neighbors.
   Be sure to checkout all the fun Halloween Collections in the SVG ATTIC Store today. 

Thanks for stopping by today.
I hope you a weekend filled full of Boo-tiful Crafting!