Showing posts with label Dry Embossing. Show all posts

Thursday, June 13, 2019

Beautiful Backgrounds using Distress Oxide Sprays & Embossing Folders


Hi, and welcome everyone. Today I'm sharing a fun and simple way to create beautiful backgrounds. These backgrounds are perfect for all those big-word dies and alphabet dies we all love. I have a video below that will walk you through the process plus a written walk-through. Watching videos is not everyone's thing, I get it.


 Okay, let's walk through the process.
I want to start off by saying I did not include the embossing folders or plate to the supply list. Several are no longer available and I thought this would be a great way for you all to revisit your embossing folders.


PREP
You will need Bristol Smooth Paper, Distress Oxide Sprays, a brayer and embossing folders. 


To create the backgrounds you want to lightly spray Distress Oxide Sprays on the inside front flap of the embossing folders. Lay a piece of Bristol Smooth paper down, and using the brayer, rollover the folder several times.


Here's the finished background, set aside to dry.

Using the remaining ink, spritz with any shimmer spray, lay a piece of Bristol Smooth paper down, rolling over the folder again with the brayer. 

You will get several backgrounds done before you need to add more of the Distress Oxide Spray to the folder.  Here's the second background, you can see it is a bit lighter.


I'm using an embossing plate for the next two backgrounds, lightly spraying the Distress Oxide Spray in the color Peacock Feathers, laying down Bristol Smooth paper, and rolling the brayer directly over the paper.


I was pleasantly surprised with the end result. 

I added Distress Oxide Spray in the color Twisted Citron and a shimmer spray over the remaining Peacock Feathers ink to create this next look. 

So you can see this a super simple technique. Here are all the backgrounds I created using the Distress Oxide Spray-Embossing Folder technique.
From here it really is personal preference how you use the backgrounds. 
Here's a closer look at all the cards I created. 


I used several of the backgrounds to make cards for this post. I started with the backgrounds created using the embossing plate.

Both of these backgrounds had a small place that looked a bit muddled and I decided to camouflage that by using a stencil and Cosmic Shimmer Texture Paste in the color Ocean Spray.

If you have never tried the Cosmic Shimmer Texture Paste I highly recommend it. It adds such beautiful texture and sparkle.


I took the opportunity to show my die-cuts some love and had such a fun time using all these products.

I finished off a few of my cards by adding stamped sentiments and sequins.


As always, thank you for popping in. If you have any questions just leave them in the comments or you can email me at contact@lisamensing.com. 

Be sure to follow me on 

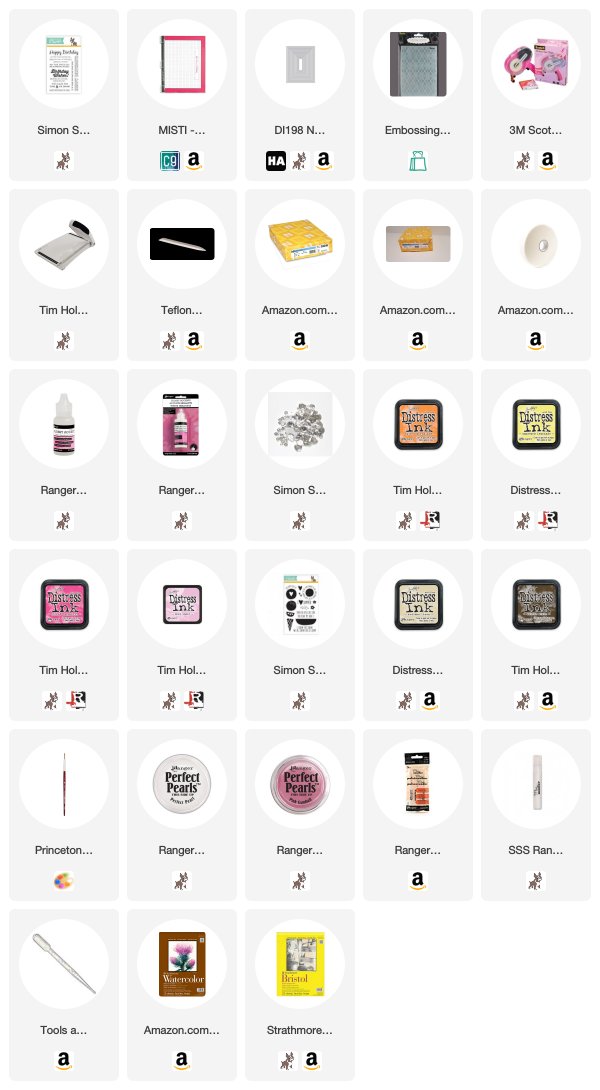
Below you will find a supply list that contains some affiliate links. 

Disclosure: I purchase all my products and by doing so I can keep my opinions real! I do not offer paid endorsements. I will never recommend a product that I would not buy again. I do participate in a few affiliate programs that allow me to earn a small commission when you purchase items through my links. This is at no extra charge to you. I love sharing through my blog post and videos and that small commission helps to offset the cost. And I'm so grateful for this.

Tuesday, June 11, 2019

Oh, Happy Day! - Faux Watercolor & Ink Smooshing


Hi, and welcome back! If you think this girl loves ice cream, you're right! I especially love anything that has pretty watercolor, faux colored or not, ice creams on it. These cards are so fun to create because you use several different techniques to create them.  I have a video below that will walk you through the process plus a written walk-through. Watching videos is not everyone's thing, I get it.


 Okay, let's walk through the process.

FAUX WATERCOLOR PREP
You can skip to 00:56 in the video for this step

You will need to Bristol smooth paper or watercolor paper, whatever you have on hand, place it in your stamping tool, position stamp.

Distress Inks in the colors: Spun Sugar, Picked Raspberry, Squeezed Lemonade, Antique Linen, Walnut Stain, any stamp set that has stable images will work and sentiments. 


Ink up the stamp with Spun Sugar Distress Ink, stamp directly to the Bristol smooth paper, ink same stamp with Picked Raspberry Distress Ink, only inking part of the stamp (see photo above), stamp directly over the Spun Sugar Distress Ink you just stamped, with a watercolor brush add water directly to the stamp, close the lid of the stamping tool allowing the inks to react with the water, once you lift the lid you will have a loose watercolor look. You can take the watercolor brush directly to the stamped image at this point to move the inks around, this step is optional. Continue the steps above until you have all images done.


Stamp sentiments using Versafine Onyx Black Ink. Set these aside to dry while you work on backgrounds.

 Simon Says Clear Stamps BIRTHDAY MESSAGES SSS101391 Preview Image

BACKGROUND PREP
You can skip to 02:42 in the video for this step.

Watercolor Paper, several sheets of scrap papers to serve as shims, water, watercolor brush, Distress Inks in the colors: Picked Raspberry, Antique Linen, Walnut Stain, Squeezed Lemonade.


Lay down scrap paper for shims laying watercolor paper on top. You want to have enough shims so that when you close the lid of the stamping tool it makes direct contact with the watercolor paper and you're not putting too much pressure on the lid. Add water directly to paper with a watercolor brush.

TIP: You can spritz water directly to the lid of stamping tool but I prefer adding the water directly to paper to avoid saturated inks running all over the place. Completely personal preference. 


Smoosh distress inks on the inside of the lid and close allowing the ink and water time to react with each other. 


Lift the lid, wipe clean and continue adding inks until you are happy with the background paper.


You can air dry or use a heat gun to dry the backgrounds. I set them aside to dry while I clean up and prep my work area for die-cutting, dry embossing, sanding and assembling the cards.

TIP #2: Add Perfect Pearls to a mini mister, add water, close and shake to mix the pearls and water for shimmer spritz. Great way to get multiple uses out of the perfect pearls.


DIE-CUTTING, EMBOSSING, AND SANDING PREP
You can skip to 04:31 in the video for this step.

Hero Arts Rectangle Nesting Dies, any embossing folder will work, I used the Darice Argyle Embossing Folder, Sand Paper or Emory Board, Shimmer Spritz

Die-cut backgrounds using Hero Arts Rectangle Nesting Dies, then place in an embossing folder and crank through a die-cut machine.  

I'm using a piece of scrap sanding paper from my DIY Home Painting supplies but you can use an Emory board, sanding block, whatever you have on hand. Lightly sand the embossed background to reveal more of the pattern. Spritz with shimmer spritz. 

I wanted to show the shimmer from the shimmer spritz I made using the Perfect Pearls. 

One of the cards I did some random stamping with sentiments to create a background. 

Layer background onto 4.25"x5.5" top-fold #110 card bases using ATG Adhesive, add 3D mounting foam to the back of faux watercolor panels and center over backgrounds, add sequins using Glossy Accents.

As always, thank you for popping in. If you have any questions just leave them in the comments or you can email me at contact@lisamensing.com. 


Disclosure: I purchase all my products and by doing so I can keep my opinions real! I do not offer paid endorsements. I will never recommend a product that I would not buy again. I do participate in a few affiliate programs that allow me to earn a small commission when you purchase items through my links. This is at no extra charge to you. I love sharing through my blog post and videos and that small commission helps to offset the cost. And I'm so grateful for this.

Wednesday, October 24, 2018

Black and White Cards


Hi and welcome, everyone! 

Today I'm over on the Twine It Up Blog sharing black and white cards featuring one of October's Showcase Products, Gray Licorice Trendy Twine. Since I'm featuring Trendy Twine that is gray and black I thought black and white cards would be perfect and it gives me a chance to show you how easy these cards can be. 


The Happy Thanksgiving Stamp Set has a lot of thankful sentiments that can be used year round. 
I decided to work with the So Thankful sentiment. This is a great guy card and super simple.

I laid black in down on an embossing folder, inserted a 4.125" x 5.25" white cardstock, carefully close the folder and run through Big Kick. Tip: If you lay the cardstock on the opposite side of the ink and secure it with post-it tape you can re-ink the embossing folder and run it back through if you need to.
Die-cut a piece of black cardstock to fit the sentiment; lay down some anti-static powder on black cardstock, stamp sentiment using VersaMark and heat set white embossing powder. 
Add fun foam to the back if the embossed white cardstock, wrap Gray Licorice Trendy Twine and tie a knot, adhere to a 4.25"x5.5" card base, add the sentiment over twine using 3D mounting foam, finish off with a few clear sequins.

___________________________________________________________

This next card is just die-cutting white cardstock, layering it over black cardstock, stamp the sentiment on the bottom right corner, offset the bottom half of the die-cut and add 3D mounting foam, wrap Gray Licorice Trendy Twine around securing in place on 3D mounting foam, adhere to card base. I just iridescent drops to finish off the card.  
The sentiment can be found on the Let It Snow Stamp Set. This set has a lot of great sentiments.


________________________________________________________________


I did the same process of adding ink to an embossing folder and running it through the BigKick. 
I used white ink on black cardstock and ran it through several times each time adding more ink. I love the way the ink pulled giving it a crackled look.  I decided to add clear embossing all over the white ink and heat set to really bring out that crackled look. 


I wrapped the Gray Licorice Trendy Twine around the card base, added 3D mounting foam to the back of the embossed black cardstock, stamped the Happy Thanksgiving sentiment from the Happy Thanksgiving Stamp Set. So easy. 


Products I used from Annie's Paper Boutique:
Gray Licorice Trendy Twine
Happy Thanksgiving Stamp Set 
Let It Snow Stamp Set


Thanks for stopping by. 

If you are new to Trendy Twine, you will want to check out these fun places:
Shop for Trendy Twine HERE
Follow Trendy Twine on Facebook