Showing posts with label Ice Cream. Show all posts

Tuesday, June 11, 2019

Oh, Happy Day! - Faux Watercolor & Ink Smooshing


Hi, and welcome back! If you think this girl loves ice cream, you're right! I especially love anything that has pretty watercolor, faux colored or not, ice creams on it. These cards are so fun to create because you use several different techniques to create them.  I have a video below that will walk you through the process plus a written walk-through. Watching videos is not everyone's thing, I get it.


 Okay, let's walk through the process.

FAUX WATERCOLOR PREP
You can skip to 00:56 in the video for this step

You will need to Bristol smooth paper or watercolor paper, whatever you have on hand, place it in your stamping tool, position stamp.

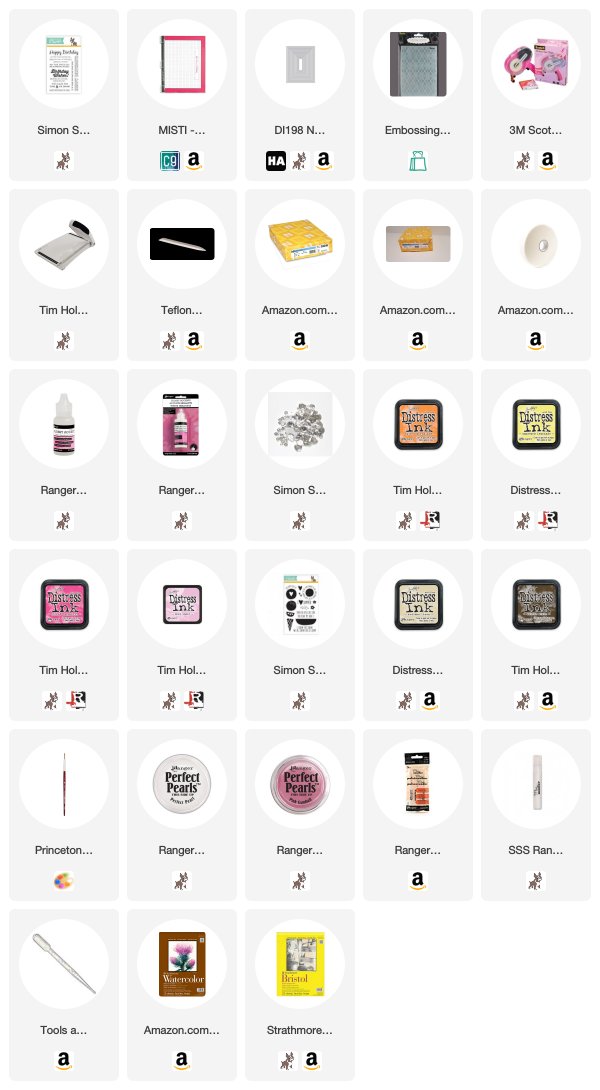
Distress Inks in the colors: Spun Sugar, Picked Raspberry, Squeezed Lemonade, Antique Linen, Walnut Stain, any stamp set that has stable images will work and sentiments. 


Ink up the stamp with Spun Sugar Distress Ink, stamp directly to the Bristol smooth paper, ink same stamp with Picked Raspberry Distress Ink, only inking part of the stamp (see photo above), stamp directly over the Spun Sugar Distress Ink you just stamped, with a watercolor brush add water directly to the stamp, close the lid of the stamping tool allowing the inks to react with the water, once you lift the lid you will have a loose watercolor look. You can take the watercolor brush directly to the stamped image at this point to move the inks around, this step is optional. Continue the steps above until you have all images done.


Stamp sentiments using Versafine Onyx Black Ink. Set these aside to dry while you work on backgrounds.

 Simon Says Clear Stamps BIRTHDAY MESSAGES SSS101391 Preview Image

BACKGROUND PREP
You can skip to 02:42 in the video for this step.

Watercolor Paper, several sheets of scrap papers to serve as shims, water, watercolor brush, Distress Inks in the colors: Picked Raspberry, Antique Linen, Walnut Stain, Squeezed Lemonade.


Lay down scrap paper for shims laying watercolor paper on top. You want to have enough shims so that when you close the lid of the stamping tool it makes direct contact with the watercolor paper and you're not putting too much pressure on the lid. Add water directly to paper with a watercolor brush.

TIP: You can spritz water directly to the lid of stamping tool but I prefer adding the water directly to paper to avoid saturated inks running all over the place. Completely personal preference. 


Smoosh distress inks on the inside of the lid and close allowing the ink and water time to react with each other. 


Lift the lid, wipe clean and continue adding inks until you are happy with the background paper.


You can air dry or use a heat gun to dry the backgrounds. I set them aside to dry while I clean up and prep my work area for die-cutting, dry embossing, sanding and assembling the cards.

TIP #2: Add Perfect Pearls to a mini mister, add water, close and shake to mix the pearls and water for shimmer spritz. Great way to get multiple uses out of the perfect pearls.


DIE-CUTTING, EMBOSSING, AND SANDING PREP
You can skip to 04:31 in the video for this step.

Hero Arts Rectangle Nesting Dies, any embossing folder will work, I used the Darice Argyle Embossing Folder, Sand Paper or Emory Board, Shimmer Spritz

Die-cut backgrounds using Hero Arts Rectangle Nesting Dies, then place in an embossing folder and crank through a die-cut machine.  

I'm using a piece of scrap sanding paper from my DIY Home Painting supplies but you can use an Emory board, sanding block, whatever you have on hand. Lightly sand the embossed background to reveal more of the pattern. Spritz with shimmer spritz. 

I wanted to show the shimmer from the shimmer spritz I made using the Perfect Pearls. 

One of the cards I did some random stamping with sentiments to create a background. 

Layer background onto 4.25"x5.5" top-fold #110 card bases using ATG Adhesive, add 3D mounting foam to the back of faux watercolor panels and center over backgrounds, add sequins using Glossy Accents.

As always, thank you for popping in. If you have any questions just leave them in the comments or you can email me at contact@lisamensing.com. 


Disclosure: I purchase all my products and by doing so I can keep my opinions real! I do not offer paid endorsements. I will never recommend a product that I would not buy again. I do participate in a few affiliate programs that allow me to earn a small commission when you purchase items through my links. This is at no extra charge to you. I love sharing through my blog post and videos and that small commission helps to offset the cost. And I'm so grateful for this.

Sunday, July 16, 2017

You're So Cool!


Hi and welcome, everyone! Lisa from The Relativity of Paper here with you today and I'm sharing a bright, summery card featuring the Double Take Ice Cream Stamps. I love the sketchy feel of this stamp and how you can use them separately or together. 


You can stack the ice creams on top of each other, too. Super cute. For this card, I first stamped the ice cream on scrap paper and cut out for masking. I randomly stamped the ice creams in pink, orange, green, and yellow masking them and then stamping the cone. To fill in some of the white space I randomly stamped the ice creams and then used a dot from the Dots Set to add a few dots. Die-cut and adhere to a patterned paper, I'm using my Perfectly Plaid paper here. Finish off with sentiment and a few enamel dots. 


As always, thanks for joining me.
You can find all the details on my blog, The Relativity of Paper


Don't forget you have till Wednesday night to enter our challenge


Thursday, July 14, 2016

Craftin Desert Divas July Release Blog Hop

Welcome to the Craftin Desert Divas July Release Blog Hop. We have some wonderful stamps and dies that we will be sharing with you.

We will first have our 2 day blog hop, starting today and then the next 4 days you can join us on our Facebook fan pages for our release inspiration projects. There is a chance to win a $15. CDD shop credit for the next 6 days when you join us.
All stamps are in the CDD Shop and now available for purchase HERE.

 Plan It Out - 5x7

 Scoops - 5x7

 Sweat Season - 5x7

 Tiny Treasure - 5x7


We also offer SVG stamp outlines for .99 they work perfectly with your cutting machine. You must have a program that opens these files. This is a great alternative to coordinating dies and much less expensive. 

Here's what I've created for you... 

 Plan It Out 

 
If you use planners for crafting this is the perfect set because it has so many
craft related words and it's a fun set to have for cards. I created this card using one of the small stamps from Plan It Out Stamp Set, Across the Borders Stamps Set (polka dots), and the Wishful Thoughts Stamp Set.


Scoops Stamp Set


I love this set with all the different elements. As you hop along with us today and tomorrow  you
will see how many different ways this can be used. To create my card I stamped my images, colored with Copics in Yellows and Greys, fussy cut, and layered onto watercolor paper inked with Broken China Distress Ink and die-cut with Fancy Frame Die, die-cut grass using Outdoor Landscape Dies, black cardstock, and yellow designer paper, on a 4.25" x 5.5" white cardstock. Finished off with Bumblebee and Blue Jean Sprinkles.


Sweet Season


So here I just used a few of the smaller elements from the Sweet Season Stamp Set to create this shaker card. Using Crazy Stitched Frame Dies to create the shaker, stamped candy canes onto kraft cardstock die-cut with Mix It Up Dies, I stamped candy canes out of left over striped paper to add with the Merry Mix Sequins. The Merry Mix is discontinued but can be replaced with Jingle Jangle and/or Peppermint Twist.


Tiny Treasure Stamp Set and Tiny Treasure Die Set

I was so happy to see the Tiny Treasure Sets. I don't have a lot of baby related items but I have a lot
of ideas. Now I can get those ideas out of my head and make room for more fun ideas. Yep, that's how it works.
So, this is super easy to create and a great go to for last minute baby cards.
Die- cut patterned papers using the onesie and elephant from Tiny Treasure Die-Cuts, die-cut background patterned paper with largest Crazy Stitched Frame Die, die-cut banner from Flag Banner Dies, stamp sentiment from Tiny Treasure Stamp Set and layer everything onto 4.25" x 5.5" white cardstock.


Patterned papers are from Snips & Snails Doodlebug Design Inc. and can be purchased from the
Craftin Desert Divas Store.


 To create this card stamped the mobile from the Tiny Treasure Stamp Set and heat embossed with gold embossing powder, die-cut the stars, hearts, and cloud from the Tiny Treasure Die-Cuts, die-cut layer with Fancy Frame Dies, die-cut the banner from Flag Banner Dies, and stamped, heat embossed with gold embossing powder from Tiny Treasure Stamp Set.

This is a last minute add-on but I am making a video tutorial for it.
This card is worth the extra effort. It requires a lot of die-cutting but comes together quickly once you have all the pieces together. Stay tuned for video tutorial.


I hope you enjoyed the projects as much as I did creating them.
Thanks for hopping along with us!
Be sure to have your Bingo card in the Facebook Craftin Desert Divas Gallery Bingo Album
and play along with us starting Saturday!


Here are the specials for this release:

Save 15% on your entire purchase. 


Use Code: July15

Enjoy this special for in stock items only 7/14 thru 7/24 at 10pm MST
All Stamps and Dies are made in the USA.


Each day from 7/14 thru 7/19 one comment left on the projects 

will be chosen from random.com to receive a $15.00 CDD shop 

credit. So be sure to join us for our 2 day blog hop and then hop 

on over to the CDD Facebook page to join us for our Release 

Inspiration HopThe CDD DT will feature more projects 

showcasing the new July release.


Your next stop is the super talented: 


Thursday Lineup..

Wednesday, June 24, 2015

Anything Goes with Crafty Gals Corner Challenge #25


Join us this week at
 for


We also have an amazing sponsor this week offering 
 
I remember my first Rick St Dennis image,
Pumpkin Head. Love these images!

Today, I'm working with
Ice Cream Sundae Element ~ Zibbet Shop
Ice Cream Sundae image colored by Lisa M
 I colored the image with COPICS, layered on cream cardstock with 
MME Record It, Here is Happy 6x6 Papers and finished off with 
Queen & Co. Twinkle Goosebump Turquoise.

 
Join us this week at
CRAFTY GALS CORNER
for
ANYTHING GOES CHALLENGE #25 
I can't wait to see what you share with us 
&
GOOD LUCK!