Showing posts with label Partial Die-Cutting. Show all posts

Friday, May 17, 2019

Feeling Cooped Up? Just say Cluck It!


Happy Friday crafty friends!  As I sit here, looking out the window, the grass is screaming cut me but first the important things, the crafty stuff, am I right? So here I am with three more funny, punny cards featuring the Honey Bee Stamps Spring Chicks and Coordinating Dies.

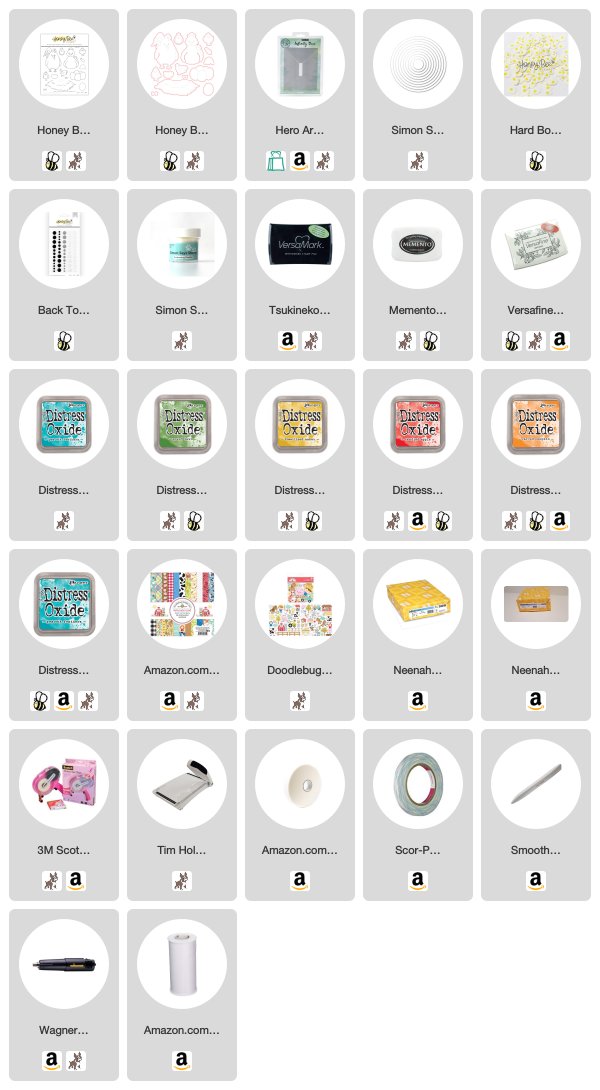
I sat down to play around with this cutie because apparently, I can't get enough of him. I knew two things when I started this; I would be doing partial die-cutting, here's a video showing how to do partial die-cutting, and I would be using Doodle Bug Designs 6 x 6 Down On the Farm Paper. After die-cutting, coloring, and about ten minutes of staring at this, I decided this thing needed some color.  Of course, I grabbed the Distress Oxide Inks, the blending brushes, and got busy. I'm not a big water-spritzing gal, but I pulled out all the stops with this card and went for it. I covered the rooster while spritzing only to remove it and see little orange specks of color on the rooster. Like, what the heck? No biggie, I just made it work for me by adding orange dots of ink, randomly and making this a "Feel Better Soon" card. Smoke and mirrors, that's all I will say! I added 3D mounting foam to the back of the panel after it dried. In the meantime, I added the patterned paper to a 4.25" x 5.5" Neenah Classic Crest - Solar White card base. That just leaves adhering this panel to the card base, stamping the sentiment on the patterned paper using Versafine Onyx Black Ink, Simon Says Clear Detail Embossing Powder, die-cut with the coordinating die and add to the card. I used enamel dots from my stash in all the colors! 

While I was purchasing the Spring Chicks Stamps and Dies from Honey Bee Stamps, I stumbled across the cutest clay embellishments, Hard Boiled - Clay Eggs.  So I decided a shaker card needed to happen only to discover that I am out of acetate! Another, what the heck moment. That's okay, it just pushed me out of the box, and I grabbed white tulle. I forget I have these things until I absolutely have to have them. 

I also remembered the Doodle Bug Designs Odds and Ends that coordinate with the 6 x 6 paper pad. Low and behold, a fence already die-cut and colored, it doesn't get much better than that. 

I created one more card somewhat like the first, minus the splattered Distress Oxide ink and adding a fence. I grabbed Honey Bee Stamps Enamel Dots. 

As always, thank you for stopping by. If you have any questions or comments, just leave them in the comments. 

Have a beautiful weekend!


Affiliate links provided at no extra cost to you. 
Friday, April 13, 2018

Just A Note


Happy Friday and welcome back! Today I'm sharing a few cards for the new CAS-ual Fridays Challenge - Forget Your Trebles. Hopefully, you will be inspired and join us. 


I have a video below that walks you through each card I created explaining partial die-cutting and my thoughts on the ever-so-popular alcohol inks! 

Scroll down for a full supply list! 


Tuesday, March 29, 2016

Under The Sea Shaker Card


Hi and welcome, everyone! Today I'm over on the Craftin Desert Divas Blog for Tuesday's Craft Tips/Tutorials. I have a fun project to share using partial die-cutting and a shaker card showcasing the adorable Under The Sea Stamp and Die Bundle.

Under The Sea Shaker Card created by Lisa In The Crafting Craft
Who says the top of the card has to be straight? Not me! 
Under The Sea Shaker Card created by Lisa In The Crafting Craft
Let's get this party started! 
1.Using the Stitched In Circle Die cut the largest scalloped circle.
2. Using the smallest scalloped Stitched In Circle Die center and lightly make a few marks around the outer edge, move die-cut to the side for now.
Die-cutting with Craftin Desert Divas Stitched In Circle Dies

 3. Decide how you want to arrange the die-cuts. Easy so far, right?
Die-cutting with Craftin Desert Divas Stitched In Circle Dies

This is where it gets interesting. 
4. Position the edge of the die slightly over your pencil mark.
5. Place top cutting plate over the die and line it up with pencil mark and run through the machine. 
Remember you don't want to cut the whole die. 

Die-cutting with Craftin Desert Divas Stitched In Circle Dies

That was the hard part. 
6. Now you have to die cut the smallest scalloped Stitched In Circle Die to create the frame.
This is very important, be sure the die is UNDER the partial cuts or you will cut through them. 
All that work for nothing, what? 

Die-cutting with Craftin Desert Divas Stitched In Circle Dies

7. Stamp images.
Die-cutting with Craftin Desert Divas Stitched In Circle Dies

8. Color images.
Die-cutting with Craftin Desert Divas Stitched In Circle Dies

9.  Create shaker. Cut acetate using the largest straight edge Stitched In Circle Die and adhere to the back of the frame. 
Die-cutting with Craftin Desert Divas Stitched In Circle Dies
Using largest scalloped Stitched In Circle Die cut patterned paper, from the Anchors Aweigh 6 x 6 Paper Pad, add 3D Foam on the backside of acetate, add sequins, and adhere to die-cut patterned paper making sure to seal tightly. 
White cardstock for the card base cut at 4.25" x 5.5", layered with patterned paper and turquoise cardstock die-cut with Outdoor Landscape Dies. 

Join me at In The Crafting Cave with Lisa for all the details.

Here are the products I used:


Shaker Bundle #1 includes:10 - 6x6 acetate sheets1 yard - Scotch permanent mounting tape


As always, thank you for stopping by!
And don't forget you can find us at

&

Need inspiration? Be sure to follow us on
Pinterest
