Showing posts with label Mood Board. Show all posts

Friday, December 22, 2017

Celebrate In Style


Merry Christmas, everyone! Today I'm sharing my take on the new Mood Board over on the SumMore Fun Blog.   The whole idea of this card is celebrating the new with the clocks, champagne bubbles and of course, celebrating in style. Does everyone dress up for New Year's Eve Parties? 

 Here's the mood board, remember you can be inspired by the photos or the color palette. 

How To
  • Stamp Clock Minutes image on Neenah #110 cardstock using Distress Ink in Antique Linen and Picked Raspberry and Black Soot
  • Let dry completely ( I used my heat gun to speed things along)
  • Once dry, I lightly go over stamped image with an anti-static bag, then stamp bubbles using Perfect Pearls Medium and add Gold Perfect Pearls, set aside to dry while cleaning up. 
  • Lightly sweep off any remaining pearl powder with a brush and/or cloth.
  • Stamp Celebrate In Style sentiment in center of clocks and on die-cut banner
  • Layer on gold foil paper using fun foam, layer gold foil on black cardstock onto black and white striped paper adhered to 4.254" x 5.5" card base
  • Finish off with gold enamel dots

Now it's your turn! I can't wait to see your take on this gorgeous mood board. 


You can also find SumMore Fun here:


Friday, November 10, 2017

Happy Holidays


Hi and welcome back. Today I'm sharing my take on the new Mood Board over on the SumMore Fun Blog.


Here's the moodboard, remember you can be inspired by the photos or the color palette. I really love the colors for Christmas and they seem to be very popular this year. 

I actually used the photos, colors, and theme for inspiration. The colors are very evident but the polka dotted trees were inspired by the gift wrap photo and the twine tied it up. 

How To
  • Cut white cardstock panel for stamping, kraft cardstock for matting
  • Die-cut circle for stamping sentiment using the VO Christmas Borders Stamp Set
  • Using the VO Polka Dotted Christmas Tree stamp I randomly stamped the tree in red and black ink, leaving enough space to stamp one tree with VersaMark Ink and heat emboss using a Pearl Embossing Powder.
  • Layer kraft cardstock onto a 4.25" x 5.5" top fold cardbase
  • Adhere fun foam to white cardstock panel(stamped) and wrap twine around several times before adding to cardbase
  • Stamp sentiment and adhere using 3D mounting foam 
  • Finish off with one white, black and red enamel dot


You can also find Victorine Originals here:


Friday, October 27, 2017

Bounties Of the Season

Happy Friday and welcome back, everyone! Today is the start of a new mood board on the SumMore Fun Challenge Blog. Be sure to hop over and check out all the amazing projects by the Design Team and enter for a chance to win a $20 GC to the SumMore Fun Store. Double that if you use Victorine Originals and/or Raisin Boat products.


HOW TO
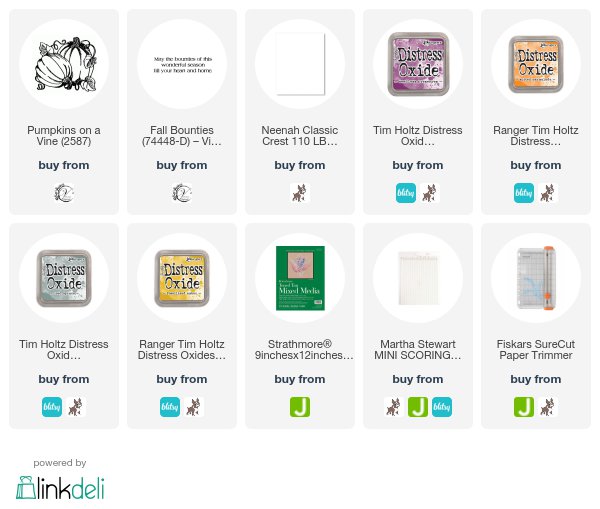
  • Using Distress Oxide Inks in Spiced Marmalade, Iced Spruce, Fossilized Amber, Seedless Preserves randomly stamp Pumpkins On a Vine, let dry; center oval die-cut and run through machine( save oval cut-out to use on a tag or another card); die-cut banner and stamp Fall Bounties sentiment using Distress Oxide Seedless Preserves.
  • Cut a piece of gold foil paper to go behind stamped paper and adhere( I purchase large pieces at HL near the framing dept. and cut it down)
  • Starting with 5" x 5" top fold cardbase, adhere stamped Strathmore paper to cardbase
  • Using 3D moutning foam adhere die-cut banner left center of oval
  • I use my mini scoreboard and emboss stylus to create the border around the stamped paper

As always thanks for stopping by! 

Friday, January 27, 2017

Thinking Of You


Hi, everyone and welcome! Today I'm sharing a little inspiration for the Craftin Desert Divas Monthly Mood Board Challenge. You still have a few days left to join in. 


I did a little heat embossing and distress ink blending to create this quick Thinking of You card. 
I highly recommend the Finetec Watercolor Set - Golds, they are gorgeous, and it takes very little water to use them. I also recommend investing in a few high-quality paint brushes or you'll just keep replacing the cheap ones. 


CARD BASE
  • 4.25in. X 5.5in. Canson Water Color Paper 
STAMP

  • Using Versafine Onyx Black Ink Stamp snowflakes and flourishes and heat emboss with clear embossing powder
  • Using painter's tape off paper and layer distress inks blending Seedless Preserves, Salty Ocean, and Peacock Feathers
  • Using Finetec Artist Mica Watercolor Set - Sterling Silver flick tiny splats over card
  • Let dry.

Affiliate Links are provided when available through ShareASale, Affiliatly, and CJ Affiliate. If you purchase through these links, I will earn a small commission at no extra charge to you.  I buy my products, and occasionally I do receive free products to review, and I will disclose that information when I do.