Showing posts with label Easter. Show all posts

Friday, March 30, 2018

Last Minute Easter


Hi and welcome, everyone! Can you believe we are already peeking into April? Today I'm over on the SVG Attic Blog sharing last minute Easter goodies for the family. Did I mention the family wasn't supposed to be getting together this year? Well, they weren't and that brings us here, me sharing last minute treat bags and a basket of goodies. The Easter Basket was already done but I figured I would share everything since I did take the time to make it. Oh, and let me mention, everyone in my family thinks they are too old for cutesy Easter fun so I decided to do "grown-up" treat bags for everyone. (Some days I can't roll my eyes hard enough at these people I call family!) 


Using SDS Carrots Mini Treat Basket that I found in Silhouette Design Store. I ran the cut-out pieces through my BigKick with a basket weave embossing folder to add a little texture and add Distress Oxide Ink in the color Walnut Stain. I'm telling you this is the easiest basket to create. It does come with a really cute mini carrot to decorate but I left simple. 


For the ladies in my family, I used pretty floral papers from my stash to create these fun treat bags using the Apple Treat Tote from the SDS Store and filled them with a few pieces of yummy chocolates.  This is my go-to treat bag because it's so easy to create. 


Just by changing the paper to a masculine paper I created bags for the guys, too. 


Rooting For You + A New Mood Board Challenge


 Hi, and welcome, everyone! Today I'm sharing another fun card featuring the Raisin Boat Oops!A Daisy Stamp Set. And course, the gorgeous new mood board from SumMore Fun Blog. 
 If you link your project up over on the SumMore Fun Blog you have a chance to win a $20 Gift Certificate to the SumMore Fun Online Store. 

I'm so inspired by the fresh flowers waiting to be potted from this mood board. In the large picture, on the left, you can see a few of the exposed roots and that's what pushed me to work with this sentiment. The sentiment "Rooting for you" inspired me as well. Roots spread and grow in all directions, leaving empty space here and there, allowing new growth. So, I mimicked that with the sentiment by randomly stamping on the card panel leaving lots of open space. 


This card is super easy to create. Just follow the steps below.


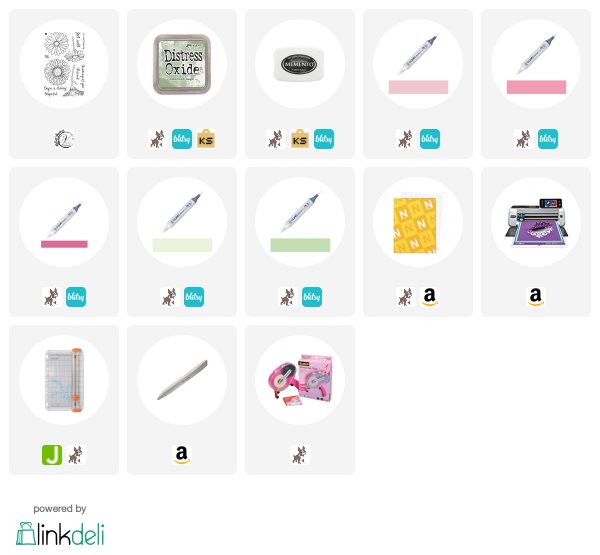
  • Stamp the flower onto #80 Neenah Classic Crest Solar White Paper using Memento Ink in the color Tuxedo Black
  • Color with COPIC markers R81, R83, R85, G20, G24
  • Fussy cut manually or with Scan N Cut machine (be sure to subscribe for a chance to win a Scan N Cut April 2nd)
  • Using a stamp positioning tool randomly stamp the sentiment on a 4.125"x 5.25" #80 Neenah Classic Crest Solar White cardstock using Distress Oxide Ink in Bundled Sage 
  • Adhere card panel to a 4.25: x 5.5" Kraft card base using fun foam or 3D mounting foam
  • Add 3D mounting to the back of the flower and center on the card
FULL SUPPLY LIST BELOW


Quick and simple, right?  

As always, thanks for joining me today. 

New to SumMore Fun?
Check out the 


Please note that some of the links below are affiliate links, and at no additional cost to you, I will earn a commission if you decide to make a purchase after clicking through the link. Please understand that I have experienced all of these companies, and I recommend them because they are helpful and useful, not because of the small commissions I make if you decide to buy something through my links. Please do not spend any money on these products unless you feel you need them or that they will help you achieve your goals.

Friday, March 16, 2018

Rosette Cards


Hi and welcome, everyone! Today I'm taking over the SVG Attic blog today with a few cards featuring these beautiful Rosette A7 cards.  I started out making one and decided I had to make another card featuring this very unique rosette. 


 For the Easter card, I used the rosette, label, and banner from this file. 
I cut the rosette using Authentique 12 x 12 Micro Basics, the label and banner are cut from #110 Neenah cardstock, the Egg is cut from Doodlebug Paper. I used the negative from the egg cutout to add Distress Oxide Wilted Violet to the label to layer the egg over. Finished off with sentiment and a few gems. The egg can be found in the Silhouette Design Store under Snapdragon Snippets - 9 Easter Eggs. All this is layered on an A2 card base. The purple mat is Doodlebug Paper cut to size.


This is the card that started this well, actually, I've been dying to use this paper, MME In Bloom Kit, for a while now and I knew it would pair perfectly with this elegant Rosette Card.


This is the actual A7 card base that is included in the file cut from #110 Neenah Cardstock, matted with MME In Bloom, the labels are black cardstock and MME In Bloom, the rosette was cut from the MME In Bloom along with the circles atop the rosette. I finished it off with a sticker from the kit and black enamel dots.


I hope you'll give these cards a try. I think you will be surprised how easy they come together. 
As always, thanks for joining us. 


Friday, March 18, 2016

Turquoise and Gold Easter Bags with SVG Attic


Happy Friday and thanks for joining me. Today I'm sharing a few treat bags I created using the SDS Birthday Bash Balloon Treat Bag and Easter Elements. 

This is a picture of turquoise and gold treat bags with gold easter bunnies created by Lisa Mensing
Gold and Turquoise are so beautiful together. 
I've had this paper for some time now and decided it would be perfect for a more "sophisticated" take on Easter. 
This is a picture of turquoise and gold treat bags with gold easter bunnies created by Lisa Mensing
I love this bunny from the Easter Elements. 
You could use this little bag for so many things and it is so easy to assemble. I'm loving it. 

This is a picture of turquoise and gold treat bags with gold easter bunnies created by Lisa Mensing
Perfect for a small Easter gift. 
The gold paper is actually a poster board. I purchased this at Hobby Lobby in the Art Department. 
It comes in a 22" x  28" sheet, I cut it down to the size I need. You can also buy silver, acetate, vellum, and more like this.  So be sure to check out next time you go. 
This is a picture of turquoise and gold treat bags with gold easter bunnies created by Lisa Mensing
Gold Poster Board
 I'm entering this into:


As always, thanks for joining me today.  And, remember you can find 
these great treat bags and Easter Elements on the 

Monday, March 14, 2016

Color/ Photo Inspiration Linky Party with Craftin Desert Divas


Hello, friends! The theme for this Linky Party at Craftin Desert Divas is "Color/Photo Inspiration"! We would love to see all of your projects that fit this theme! So go ahead and craft it and link it up on the Craftin Desert Diva's Blog.

Every other Monday will mark the beginning of a new semi-weekly Linky Party over 
at the CDD blog. We hope you will share your projects with us! And don't forget 
about  the prizes! Every Linky Party will have a winner and a Top 3! 
The more times you link up...the more chances you have to win!!

Our Sponsors for this Linky Party are:

One 4"x 6" stamp set
One Digi Stamp of choice

$25 Gift Card (Regular Priced Items)

Here is what I made.

I stamped the image with Memento Ink Tuxedo Black, colored with COPICS, die-cut
6 x 6 papers using Fancy Frame Dies and Stitched In Circle Dies, layered on white
cardstock and finished off with matte enamel dots.


Here are all the CDD products I used:


Hunny Bunny Stamp Set


Fancy Frame Dies


Stitched In Circle Dies


Girl Assortment Sprinkles


Brigth Assortment Sprinkles 


Love Assortment Sprinkles


As always, thank you for stopping by!
And don't forget you can find us at
Craftin Desert Divas Blog
Craftin Desert Divas Shop 
Craftin Desert Divas Facebook Gallery 

In The Crafting Cave with Lisa Facebook Fanpage