Showing posts with label Pink and Main. Show all posts

Friday, August 30, 2019

Take A Bite Out of Life

Hi, and welcome back! Today is my last day as Guest Designer for Pink and Main. I have thoroughly enjoyed my time and your hospitality, thank you for having me. Today I'm sharing a quick encouragement card featuring Pink and Main's Toucan Do It Stamps and Dies along with the Pen Pals Paper Pad. I also have a quick video tutorial over on my YouTube Channel and website.

I’m getting started by laying a piece of #80 cardstock into my Misti, I’m using Memento Ink in the color Tuxedo Black to stamp the image so I can color it with my Copic markers. I stamp the image several times to ensure I have a crisp dark stamped image.
I have my image ready to be colored, and I pulled that chevron paper out so I can match my COPIC colors to the paper. I’m going to speed up through the coloring and quickly tell you the colors I used. BG18, BG15, BG13, BG11 YR68, YR65, YR61, N4, N2, and N0.
Here’s that cute croc all colored up and ready to be run through my sidekick. I grab the coordinating die and secure it over the image using a piece of post-it tape then crank it through the machine. Let’s set that aside for now.
I’m only going to stencil the lower third of the card base because I’m adding the patterned paper over it. So only a small area will be seen once I’m done.
I cut the patterned paper down to 4.25”x5.5”. Using pinking shears cut the paper to mimic the crocs mouth being sure to cut it so it looks like the mouth is open. Add 3D mounting foam to the back of the patterned paper and position on the card base. 
Using Vellum, I die-cut a heart to go behind the croc. Add 3D mounting to the back of the croc and secure to the vellum heart. I laid down 3D mounting foam where the vellum backed croc will be adhered and add silver thread, letting it fall onto the mounting foam to secure then adhere to the vellum backed croc over it.
I have a piece of black cardstock in my Misti, I cover it with anti-static powder, stamp the sentiment using a WOW Embossing Pad, add white embossing powder when I’m using white embossing powder, I always clean the cardstock off with a small brush before heat setting.
I trim the sentiment down using my handy dandy paper trimmer. Use pinking shears to snip the tails of the sentiment, add 3D mounting foam, and adhere to the card.
I add Pink and Main’s Sequins using glossy accents and my pick-me-up stick.
I dress up the envelope by stamping half of the croc in the lower-left corner and color the heart to match the card.


Thanks for joining me.
 I hope you are inspired enough to head to your crafty space and create something amazing today! 
Be sure to head over to the website and become a subscriber, so you have access to my videos before they are published to the public. Did you know that every time I send an email to my subscribers a name is picked from my active subscribers to win a little something? 


Friday, August 23, 2019

If The Broom Fits

Hi, and welcome back! Today I'm over on the Pink and Main Blog sharing a Halloween card featuring Pink and Main's Witch Brew Stamps and Dies along with the Not Too Spooky Paper Pad. I also have a quick video tutorial over on my YouTube Channel or website.

This card is very easy to create, and you can make multiples at one time, using different patterns with each card allows you to change the look with minimal effort.

So to get started I do a little prep work. I create a template using a 4" x 5.25" piece of cardstock, use the inexpensive stuff, it's just a template. Center the coordinating die-cut on the cardstock and run through a die-cutting machine. You can skip the template, cut your pattern papers, use one of the pattern papers instead. I didn't want to take a chance on messing up my pattern paper, so I played it safe with the template.
  • Lay a 4.25" x 5.5" card base into a stamp positioning tool, center the template on the card base, now position the stamp, lift the stamp with the lid, and set the template to the side.
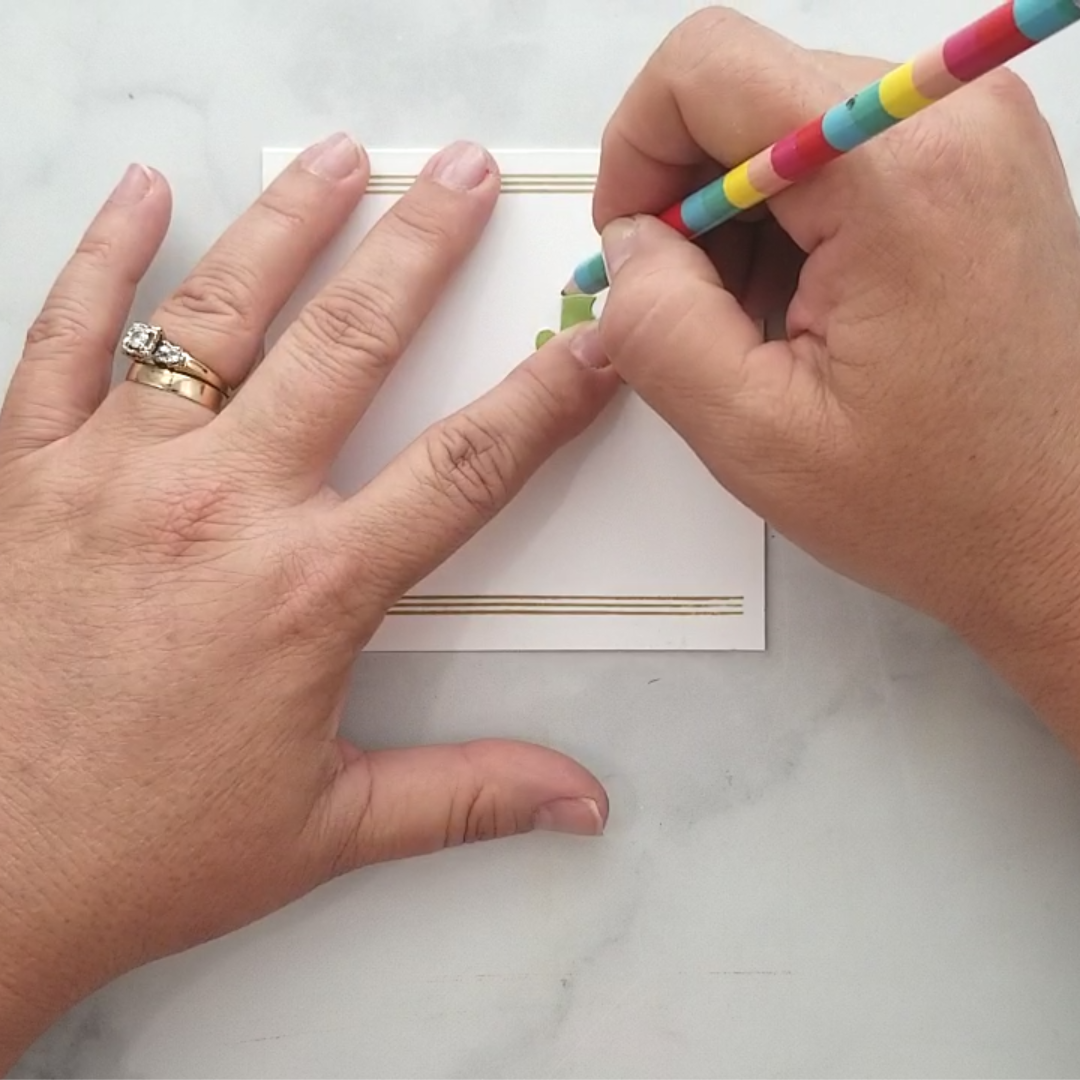
  • Ink blend two shades of yellow where you will be stamping the image. You can use the template and add light pencil marks, so you know exactly where to lay the ink.
  • Stamp the image using black ink.
  • Now you can cut your pattern paper to the same size as the template, lay the template on top of the pattern paper, nestle the die into the template, secure with a piece of post-it tape and run through your die-cut machine.
  • Add 3D mounting foam to the back of the pattern paper, center over stamped, press firmly to adhere to the card base.
  • Die-cut bats using black cardstock and adhere to the stamped image using 3D mounting foam.
  • Stamp the sentiment "if the broom fits" using Versafine Onyx Black ink, add to the card using 3D mounting foam. Add one tiny bat to the sentiment and any remaining bats around the stamped image. Finish off with sequins.


Thanks for joining me today! I'll be back on the 30th and hope you'll join me again. Until then, feel free to visit my website, lisamensing.com, and have a great week.


Wednesday, August 14, 2019

Pen Pals + Gate-fold Cards with Pink and Main


Hi and welcome, everyone! Today I'm over on the Pink and Main Blog sharing some super simple cards featuring the Pink and Main Pen Pals Paper Pad and Sent with Love Stamp Set to share with you. These cards are so simple, I want to dub them the cardmaker's BFF! It doesn't matter if you are just starting out with minimal supplies or if you own a drawer full of paper pads waiting to be used, they are perfect for all of us. I fall under the latter of the two, so I love that I can use up some of my stash making room for the new stuff, like this adorable paper pad.


VIDEO TUTORIAL


To get started, I recommend creating your gate-fold card bases, I keep a few on hand because I use them so often. For the cards I'm making today I'm starting out with an 8.5" x 5.5" piece of cardstock.
Tip: You can score the gates(flaps) of the gatefold anywhere you want as long as the width of both flaps equals the width of the card. For instance, I scored this card at the 2" mark for the left gate and then at 2.25" for the right gate giving me a 4.25" total width. This can be applied to any size gatefold.

To create these cuties, you'll want to cut the paper full of cute images and sweet sentiments apart.
I back the images with gray cardstock and trim leaving 1/16" frame around the image plus it makes them a bit sturdier for their journey.
Pick a few pieces of patterned paper and cut to fit the gates of your card, inside and out. I like using different patterns for this.

Now you can arrange the framed images on the front of your card and adhere using a strong adhesive, I used sookwang tape. (be sure to only secure one side of the image so that your card opens)

I used the Sent with Love Stamp Set and added sentiments to two of the cards. The sentiments pair perfectly with the images and patterns in this paper pad.


Here are a few places to donate handmade cards. I am not affiliated with these groups so please refer to their website for all information on donating cards.


Thanks for joining me.
 I hope you are inspired enough to head to your crafty space and create something amazing today! 
Be sure to head over to the website and become a subscriber, so you have access to my videos before they are published to the public. Did you know that every time I send an email to my subscribers a name is picked from my active subscribers to win a little something? 


Saturday, August 3, 2019

Pizza My Heart with Pink and Main


Hi, everyone! I'm so thrilled to be the Guest Designer for August for Pink and Main. The wheels have been turning with ideas to share with you throughout the month, and I hope they inspire you to create something amazing! I've created a Puzzle-Shaker card for my first project featuring the Pink and Main Super-sized Stamps, and Coordinating Dies along with the Puzzle Heart Die and Pattern Maker Stamp Set.  You can check out the video tutorial over on my website or YouTube. 


Stamp the pizza slice 6 times, keeping the slices as close to each other as possible without overlapping them. Stamp one slice off to the side to be colored and die-cut later.  Color the pizza slices using COPIC markers.
CRUST: E31, E33, E35, E337 
SAUCE: E09
PEPPERONI: R24, R39, E07, E09
CHEESE: W00, W1, W3, Y21


Die-cut the slices using the Puzzle Heart Die, I was careful to keep the pieces together, but you can use Cling Wrap if you prefer. Flip the heart over, remove one puzzle piece for shaker window, add adhesive, and secure a piece of acetate over the heart and trim. Add 3D mounting foam to the acetate. 

Using the Pattern Maker Stamp set, stamp three lines on the top and bottom of a 4.25" x 4.25" #110 top-fold card base with khaki ink. Lay the puzzle piece behind the heart and center the heart on the card base. 
Carefully remove the heart, holding the puzzle piece in place and lightly trace around the corners of the puzzle piece. This allows us to lay our sequins down and avoid the "upside-down guessing game." You know exactly where to place your heart, too. Add sequins. I used a sequin mix of reds, greens, and golds.

 Remove backing off 3D mounting foam and adhere to card base pressing firmly in place. 
Die-cut the single slice of pizza using the coordinating die from the Super-sized Dies. Add mounting foam to the back of the slice of pizza and position in the top right corner, be sure to leave the shaker window peaking out. Stamp sentiment onto Kraft paper using embossing ink, add white embossing powder and heat set. Trimmer down with paper trimmer, add 3D mounting foam to the back and adhere to the lower part of the pizza puzzle. Add three sequins to finish the card.